
A friend recently sent me a email about a Brother Embroidery and Sewing machine, and I had mentioned to her that someone had offered to sell me a Brother Scan N Cut for $50 and I stupidly turned it down because I didn’t think that I would even use it because I thought it was for cutting paper only. I didn’t even know what it was, so after it was offered to me, I went to YouTube to watch some videos, and I discovered how much I really wanted one, but by then it was too late.
After I turned the Brother Scan N Cut down, I went online and did some research and watched a lot of videos on YouTube and I had decided that I wanted a Cricut Explore Air 2. I actually wanted a Cricut Maker because it cuts fabric with a fabric cutting wheel, but it’s also $400 lol. The Cricut Explore Air 2 was $196 at Christmas, and is often on sale for around the same price. Also, I think the extra things you have to buy like new blades, cutting mats etc are cheaper than for the Brother, but I could be wrong. I’ll have to do more research, but my mind is pretty set on the Cricut.
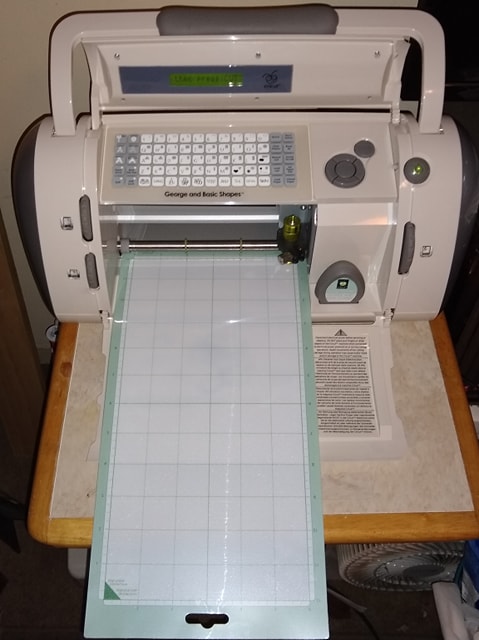
So I told her I was saving for a Cricut, and she texted my life partner that she was dropping something off on our doorstep, and when I went out there to look, there was a box for a Cricut Personal Cutting Machine. This is model CRV001 which I think is one of the very first Cricut Electronic cutting machines ever made. I have got to stop telling people that I want things. I wasn’t hinting around to her that I wanted for HER to buy it for me, but she told me she’s had it in her closet for years. HA! Sounds familiar. (you know because I was in the closet for years… It’s when you have to explain the joke that it isn’t that funny.)
This Cricut only uses a 6″ x 12″ cutting mat and it requires a rubber keyboard and a cartridge to cut. You can plug it in to your computer since it has a USB port on the back next to where you plug the power cord in to, but it didn’t come with a USB cable. I bought one on Amazon just to see if I could even use it with my computer, but unfortunately it doesn’t connect to Cricut Design Space.
So, I’ve had a little bit of fun with this Cricut. I bought 2 cartridges. One is called Sweet Tooth Boxes and the other is called Creative Everyday Cards, pictures below. The boxes one came with the keyboard, but the cards didn’t, so I had to print out a keyboard to use as a reference so I know which buttons to press. This Cricut came with a cartridge called George and Basic Shapes, but if I am going to cut words out, I want to be able to see them on the screen so I can adjust the placement and to make sure all the letters actually fit on the same row, and to be able to center the text etc.
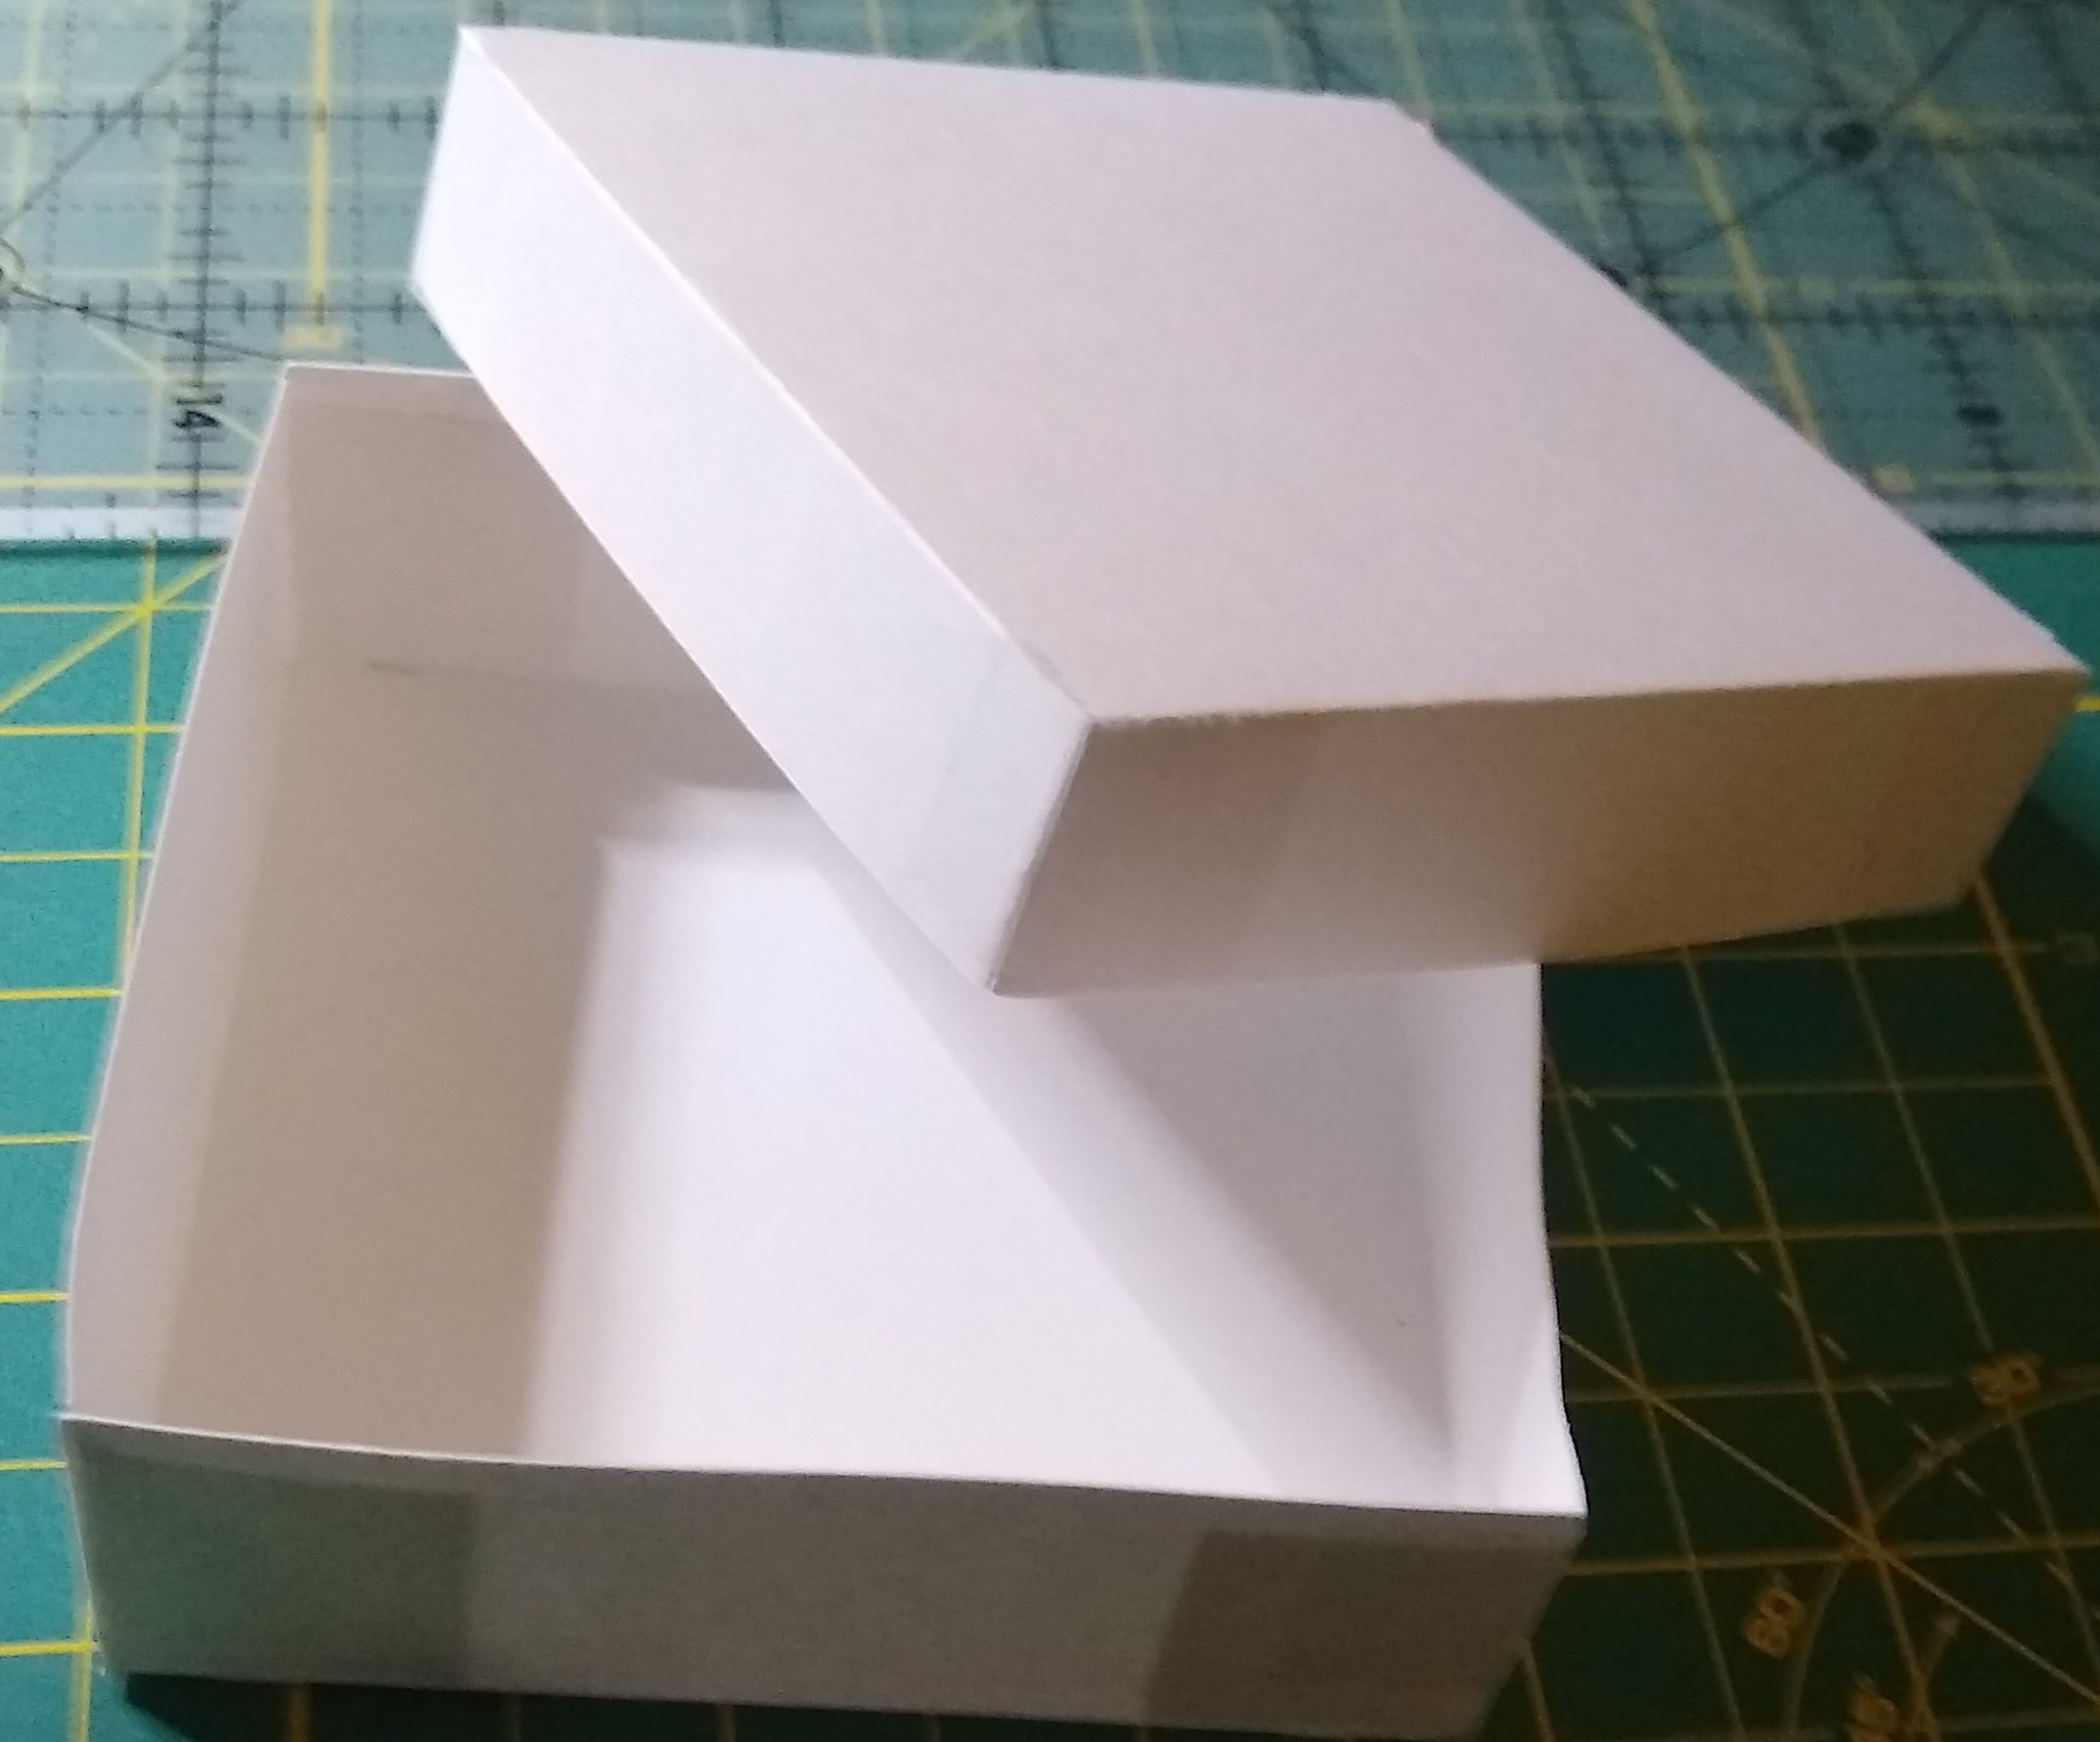
I love this machine, I am not complaining about it, but there is a problem with only having a 6″ x 12″ cutting mat. Most cartridges have patterns that require you to have a 12″ x 12″ cutting mat, like for example, all of the boxes in Sweet Tooth Boxes need to be 9″-11.5″ and in order to be able to cut the envelopes for the Creative Everyday Cards, I need to be able to cut on a bigger cutting mat. It doesn’t say how big, but it says on the screen that it’s too big for the cutting mat. So before I buy any more cartridges, I have to make sure they will actually cut on a 6″ x 12″ mat. Buying these cartridges isn’t a complete waste of money though, because I can still use them on the newer Cricut Explore Air 2.
Here are some cards that I made with this Cricut Personal Cutting Machine. The paper I used was a big pad of 12″ x 12″ sheets from Joann called Park Lane Paperie that comes with 58 sheets that are textured printed card stock that cost $20, but was on sale for 50% off. Cricut makes their own paper that have patterns, but they also cost a lot more money for only a few sheets.


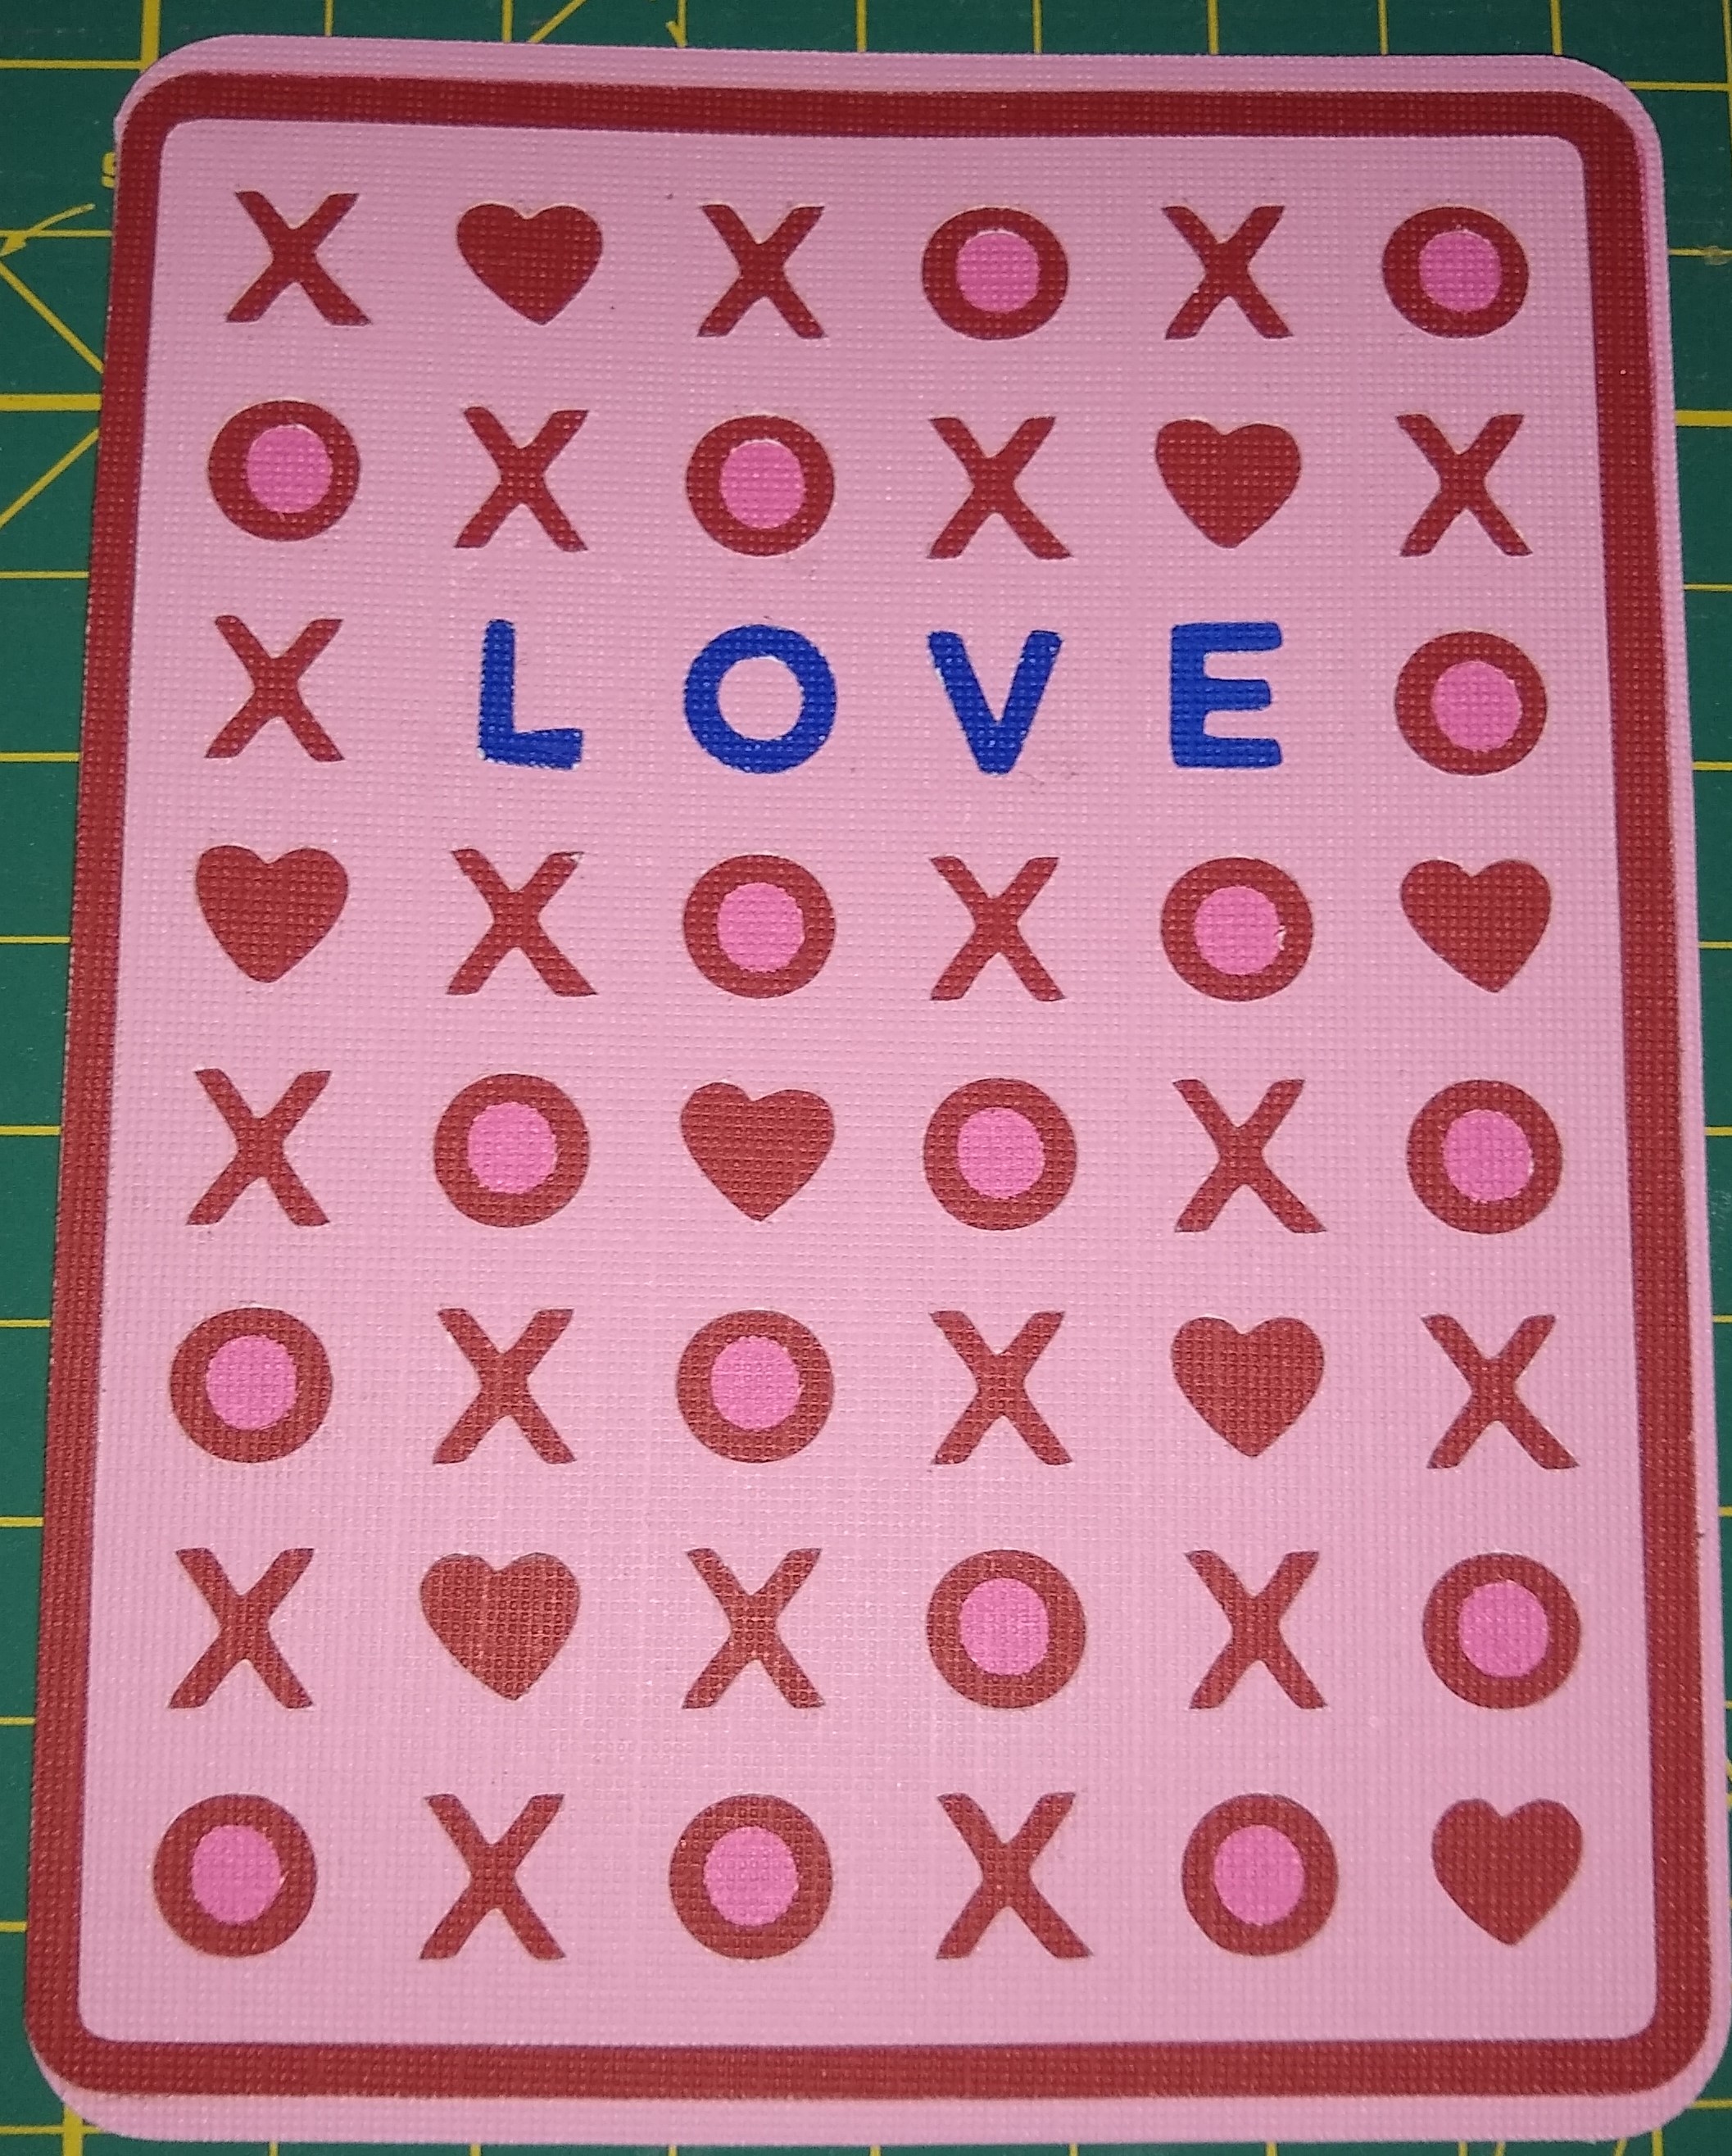
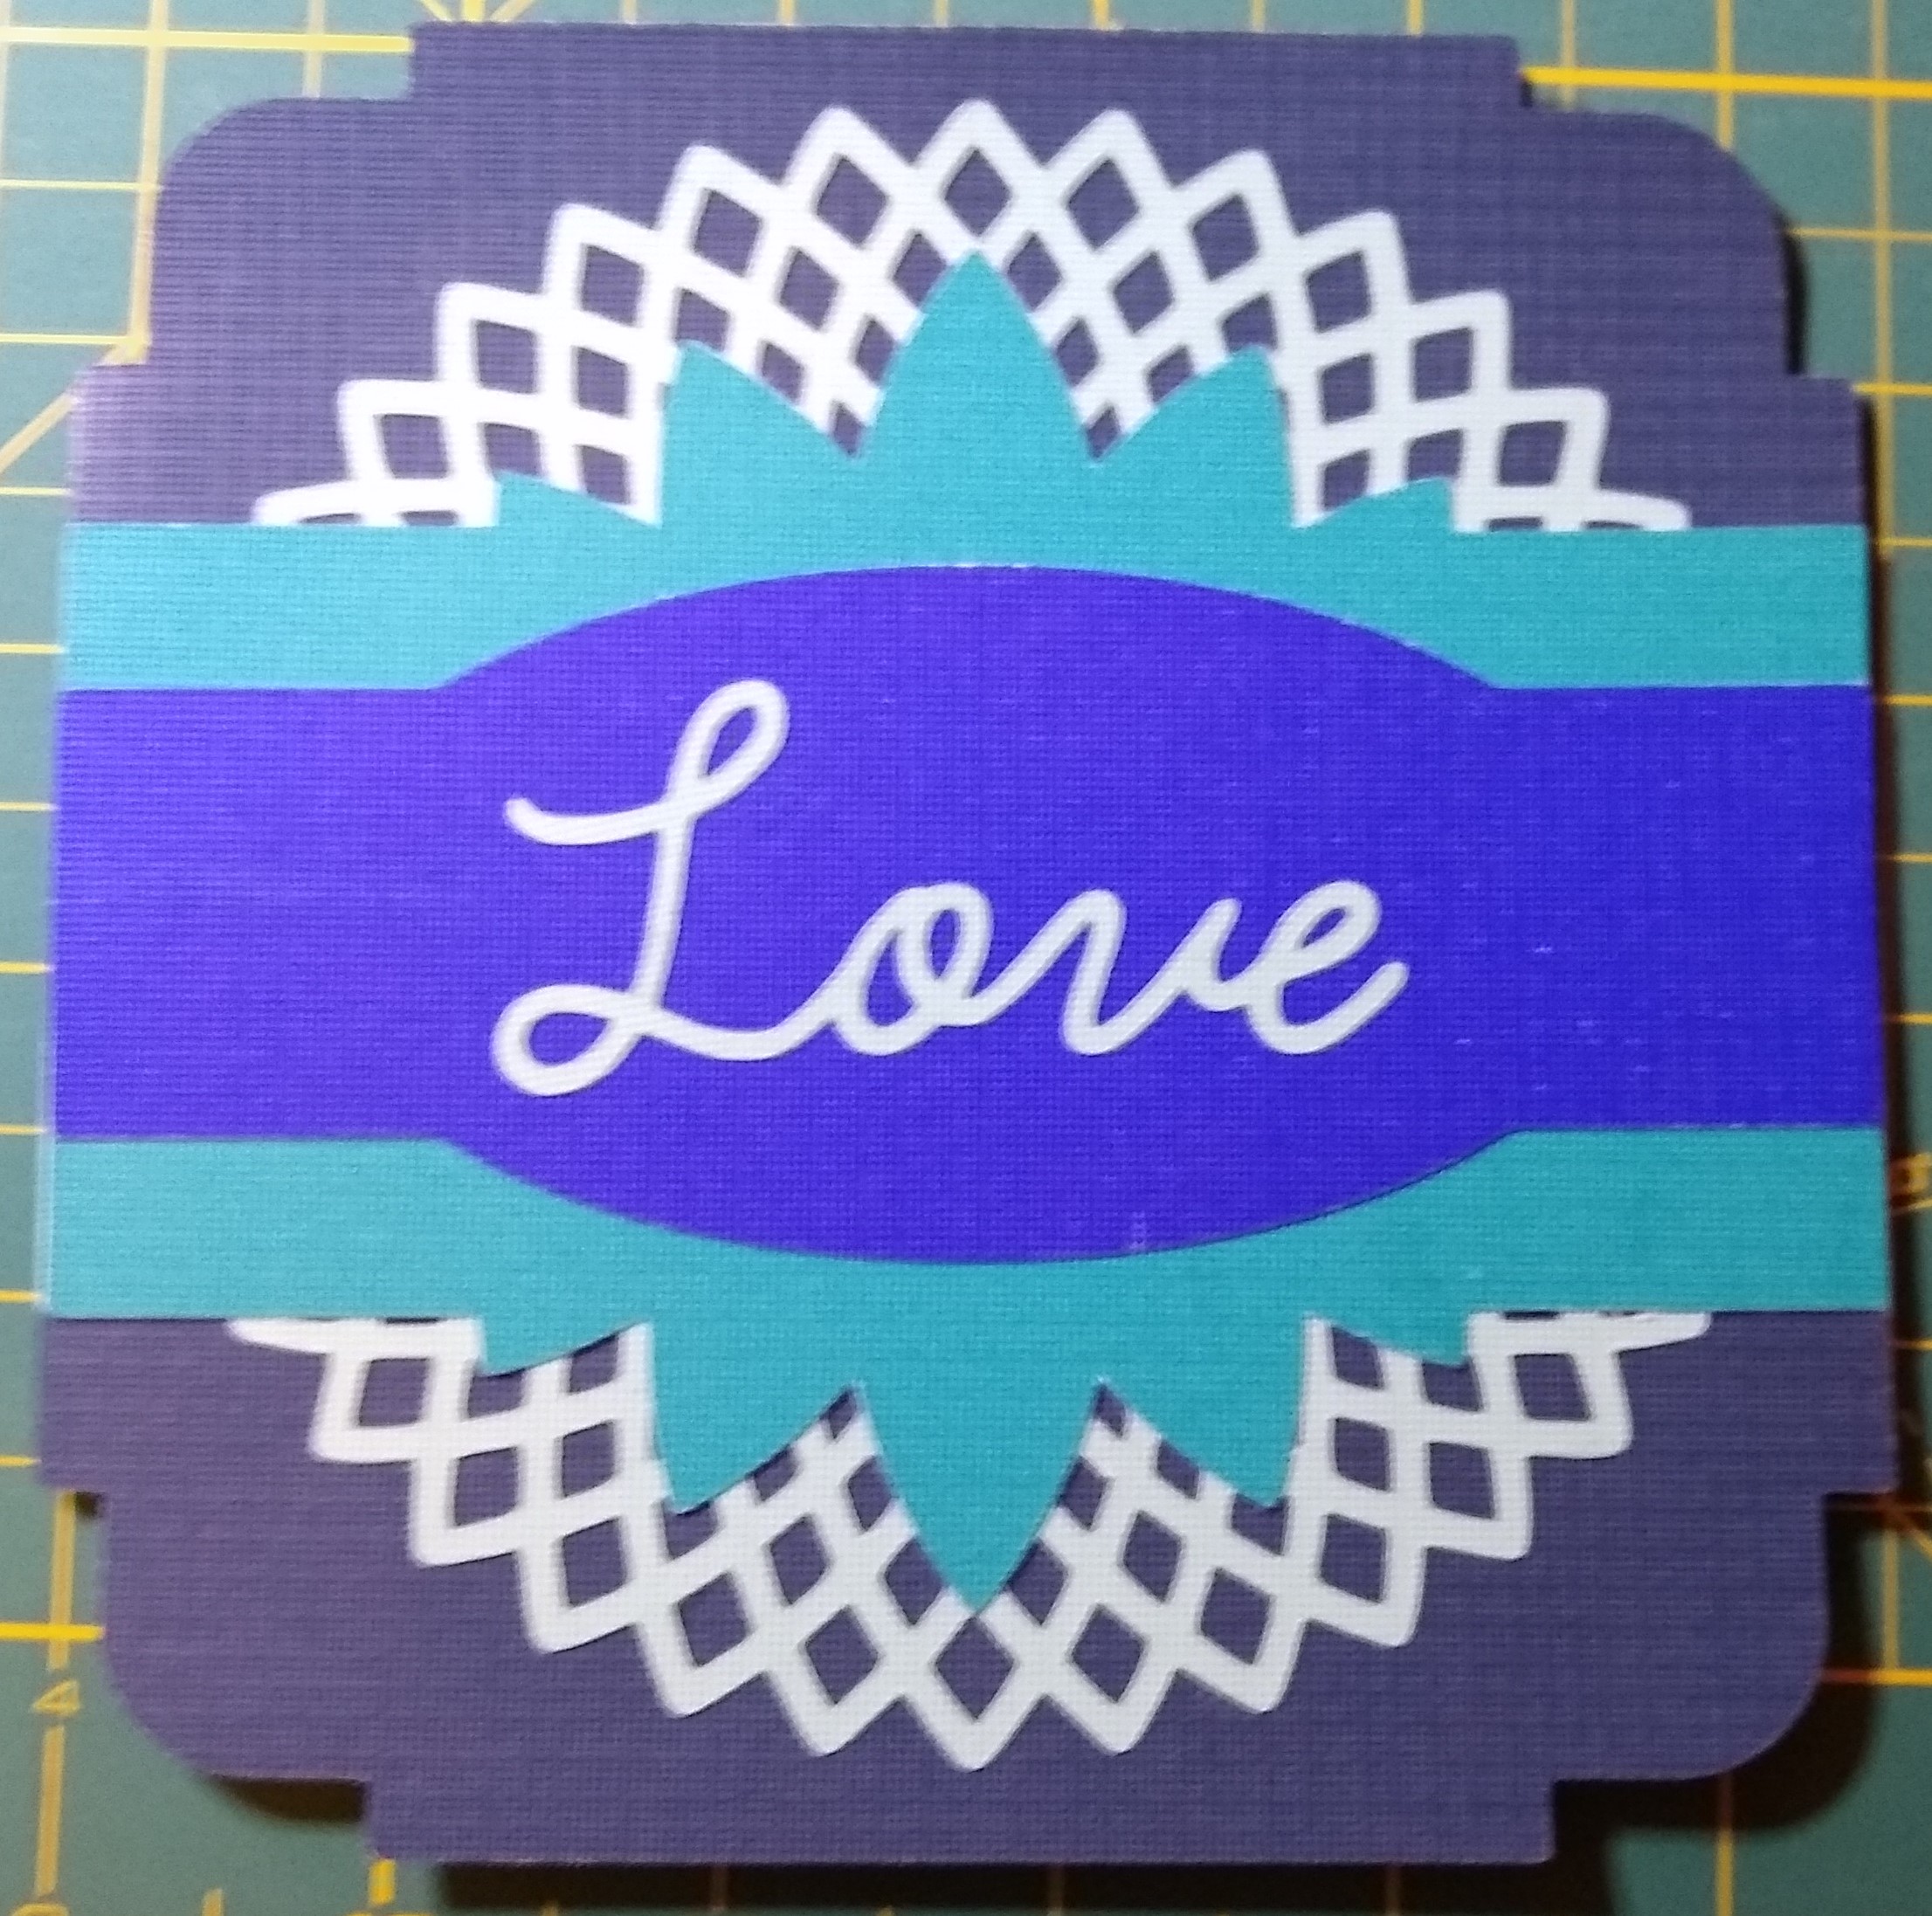
The cards are very thick since there are multiple layers glued together on the front of the card, and the inside of the card will have another piece cut that you could run through your printer to print a poem or whatever you want it to say, or you could write on it and then glue it to the inside.
I said I couldn’t make any of the boxes, but technically you can, if you don’t mind a tiny version of the actual box. Unfortunately, some of these are too tiny. The first box is a regular square box that is supposed to be cut at 11″, but I cut it at 5.5″ and it came out to be 3.25″ after I folded all the sides up. I can still use this small box for I’m guessing 9 pieces of candy, but I won’t know until I actually make Chocolate Truffles or Chocolate covered cherries again.
The box in the middle is supposed to be a Chinese takeout box printed in 1 cut and folded exactly the way they fold the actual Chinese takeout boxes, but this is smaller than a bottle of white out. Sorry, Bic Cover-It. It’s actual size is 1.25″ at the top and bottom and tall. When folded, it’s a perfect cube.
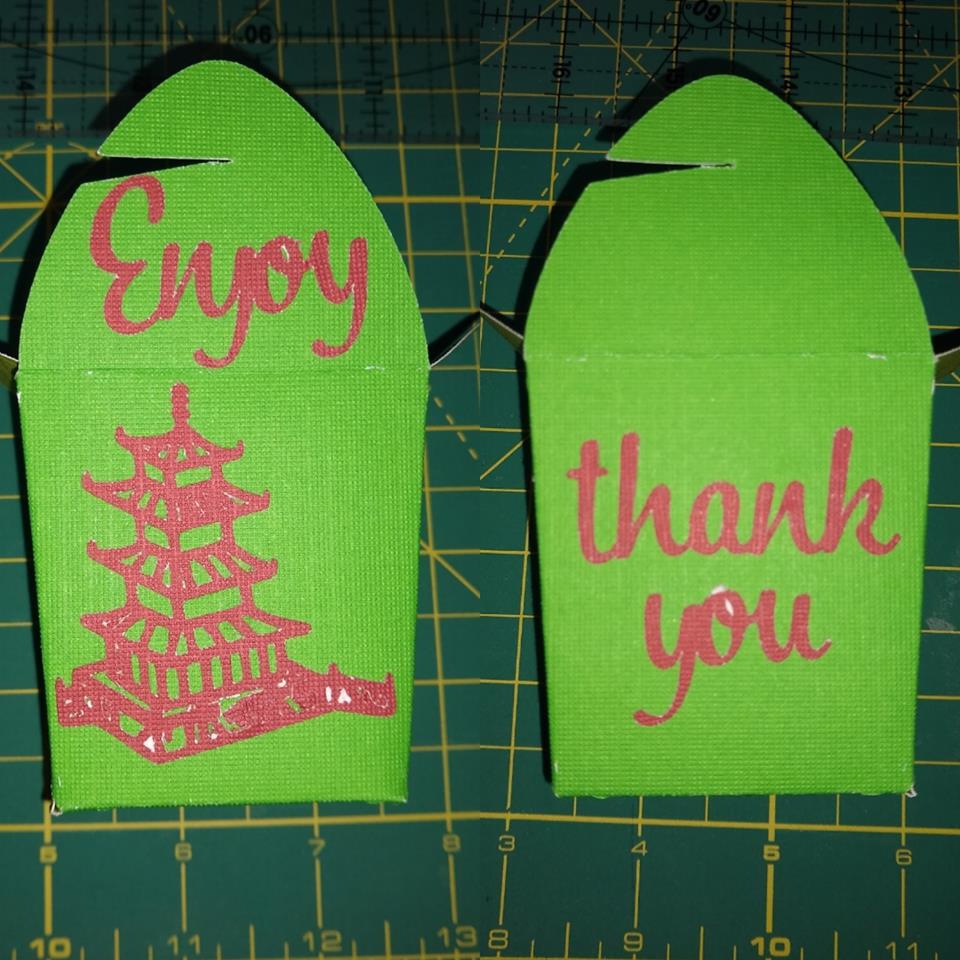
Then the 3rd box is another Chinese takeout box, but this one is cut with 4 separate pieces you glue together, then you cut the red pieces and glue them on, but they were very tiny when I cut them, so they weren’t cut with the precision of a bigger machine. Also, the box is 2″ at the bottom, 2.25″ at the top and it is 2.5″ tall when the top is folded.

I do love this machine, I appreciate that I didn’t have to pay money for it, and I can give it back when I buy a new machine. I think this is the perfect starter machine, because it gives me an idea of how it cuts paper and allows me to make some pretty cool things that I never would have imagined before. I definitely cannot wait to have a newer machine though because I have so many ideas for things I want to make.

