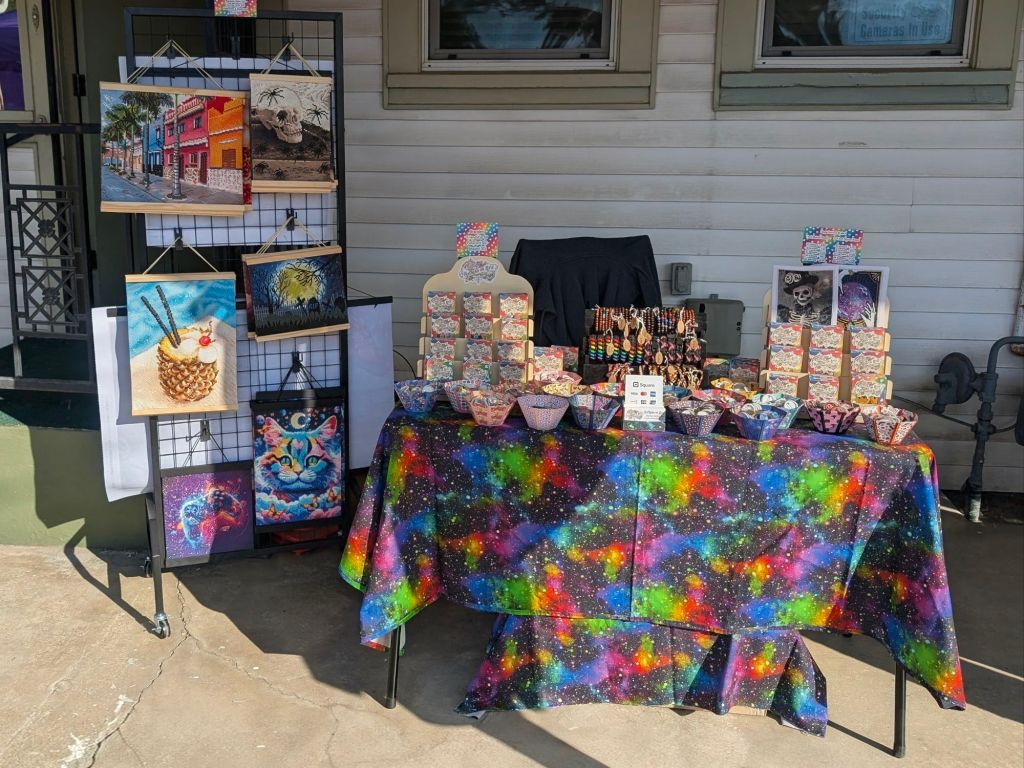
I was invited back to the Enchanted Cottage for their fall craft faire this October, and I had such a fun time and made a little bit of money.
Of course, not enough to pay me back for all of the money that I spent to be there, but I still made enough money to pay down one of my credit cards that paid for some of the things I bought.
Over the summer and after, I had spent probably $400 or more on Summer and Halloween Diamond paintings. I also spent $40 on that display stand for the diamond paintings. I originally thought that I only made $86, but it turned out I made $116. And then I sold two more Diamond paintings after the craft fair, and I’m adding that amount to this considering they were supposed to be sold at the craft fair. But that was an additional $120, so that’s not bad. That makes my total $236. The customer who bought one of the diamond paintings in my Etsy shop also bought more buttons which after Etsy and shipping fees came to $100 in profit deposited to my bank account, but I’m only counting the $60 for the diamond painting that I had on display at the craft faire, and not the custom order she placed for buttons.
It still didn’t quite pay me back for everything that I bought, but that’s ok because I’m just happy I was able to earn a little bit of money, and I have the rest of the diamond paintings in my Etsy shop, so who knows if/when they’ll sell.
My Etsy shop is currently in vacation mode because I need a triple bypass heart surgery, and I don’t know when that’ll happen, but I’m too busy working on diamond paintings for people who have requested them, which will ultimately add to the amount of money I’ve made which should hopefully put me back in the green. So I’m doing pretty good.
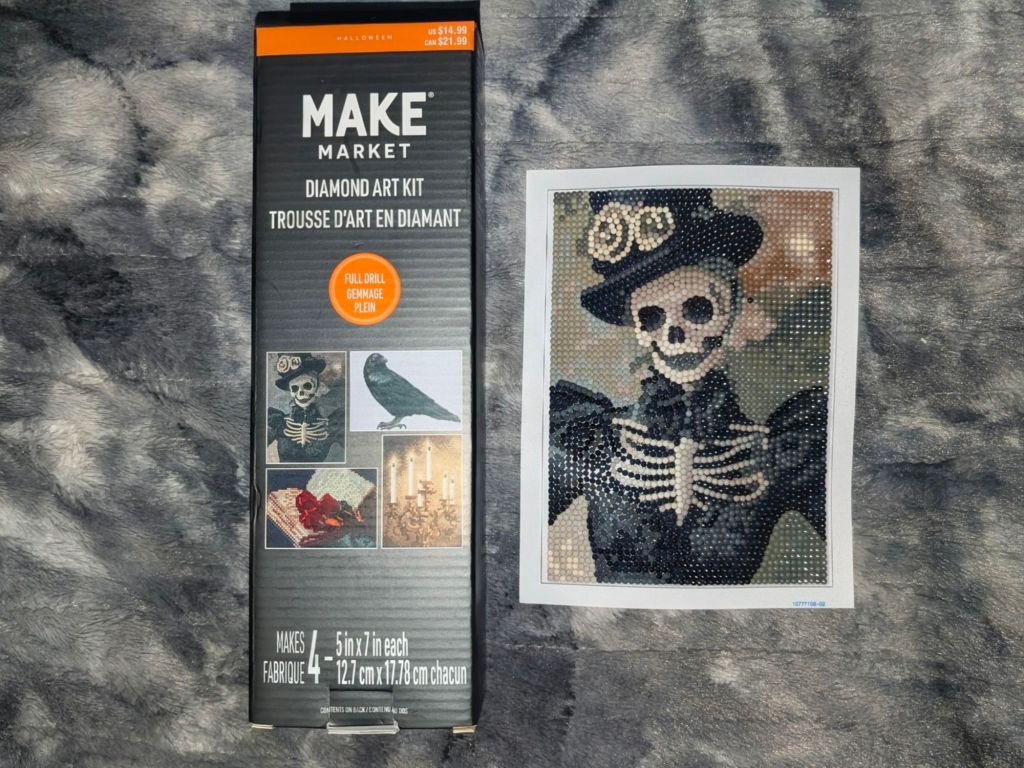
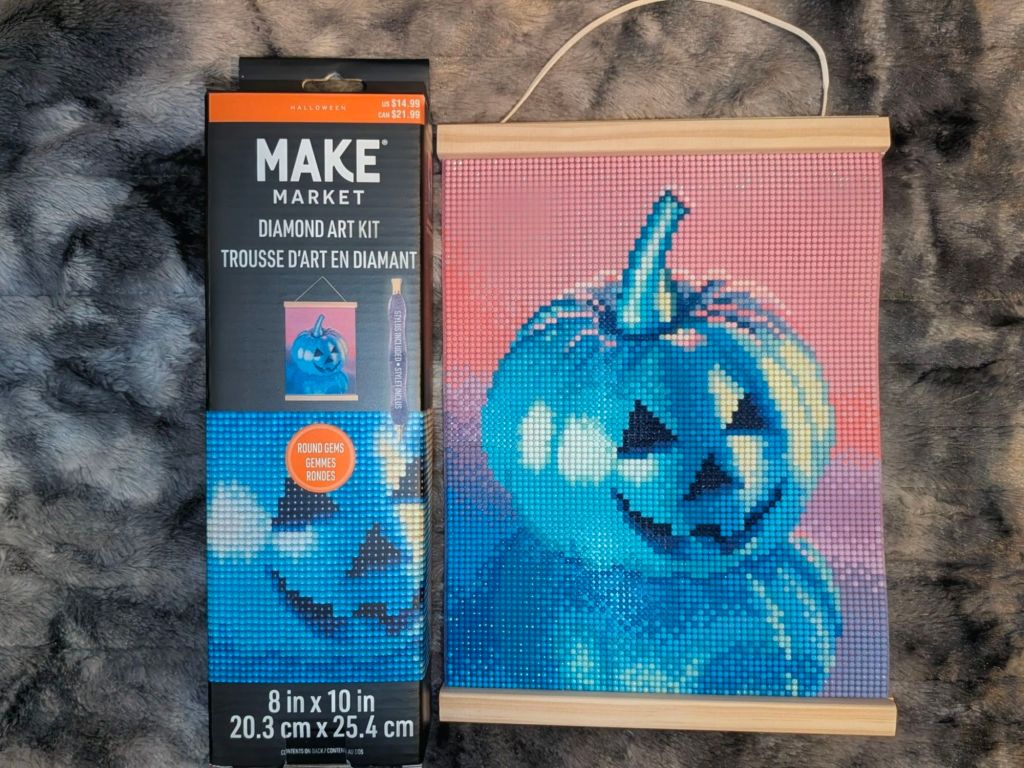
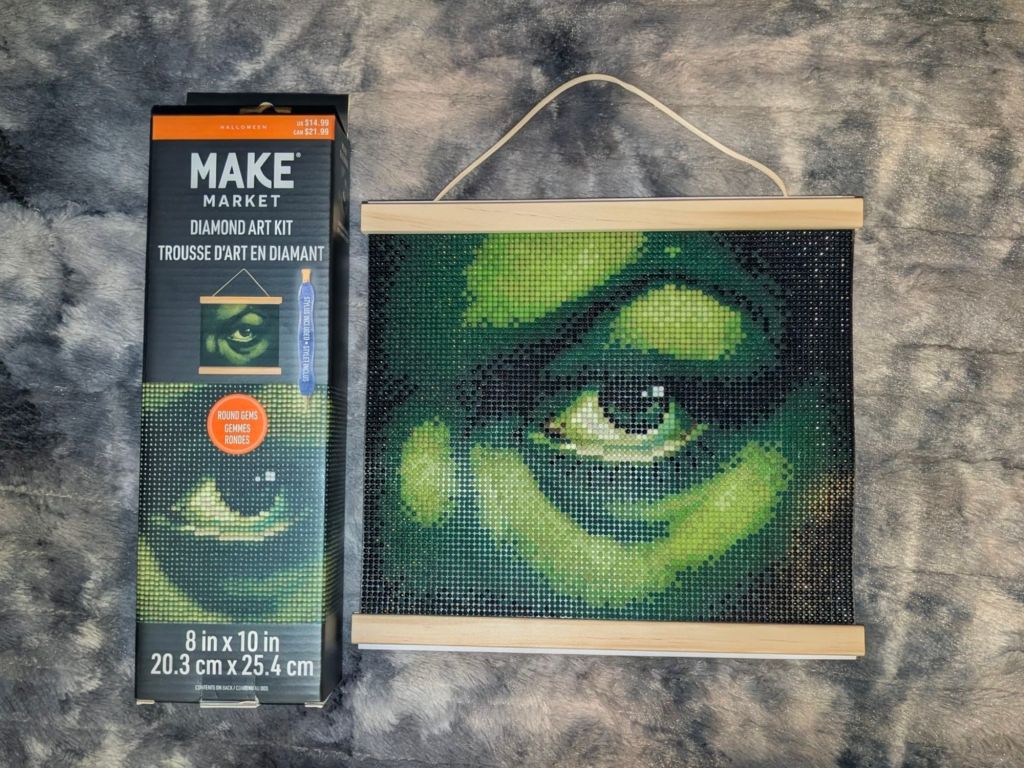
These are the diamond paintings that sold at the fall craft faire. The first one was the game controller from Temu, then there was the ghost from Make Market which is an 8×10. Then one of the psychics who works at Enchanted Cottage bought the skeleton lady 5×7 Diamond painting from the Dead Regency box, but at the end nobody bought the other ones, so I just gave the rest of them to her with the Box. They should really stay together anyway.
Neon Game Controller from Temu Ghost
Of the five Summer Diamond paintings that I had that are 11×14, I had to remove three of them from the display because the frames were messed up. They were already bent in the box when I bought them, and I did not glue them to the diamond paintings. I should have, but I didn’t. Instead, I used double stick tape to hold them together, which is what I do with all of the ones that have with the wooden magnetic frames rather than gluing them. But the summer ones I’m going to have to glue the frames on to keep them together.
I do not plan on buying any more diamond paintings for the spring craft fair because I don’t think anyone will buy anything that I make. I will still continue working on the diamond paintings that I have that I will bring with me to the Spring Craft fair and hope that someone does decide that they want to buy them.
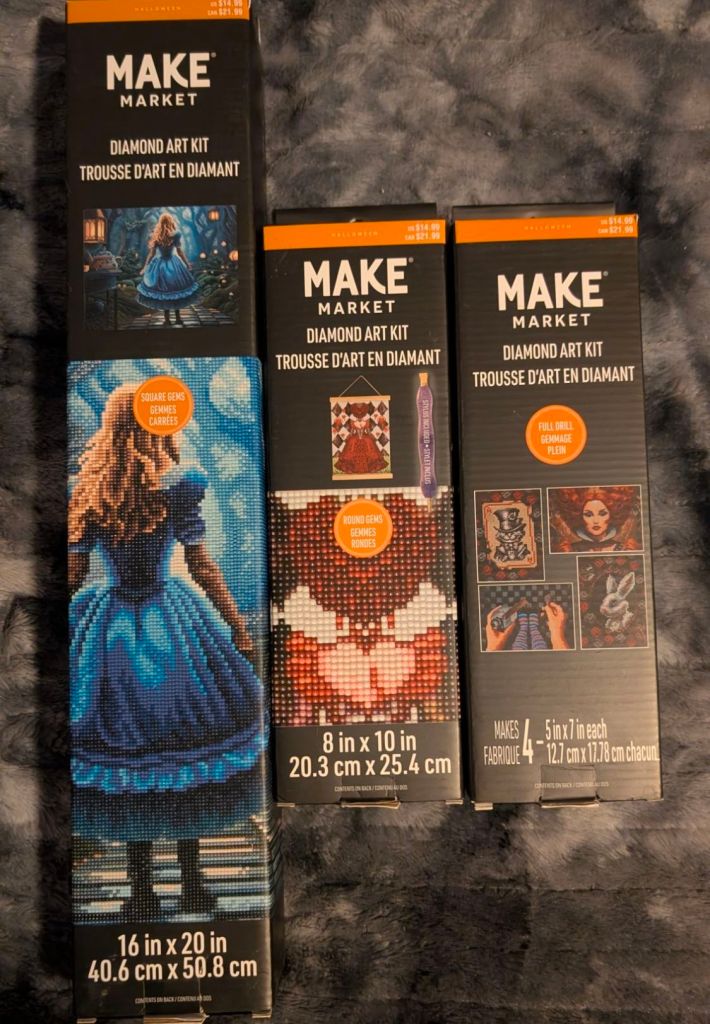
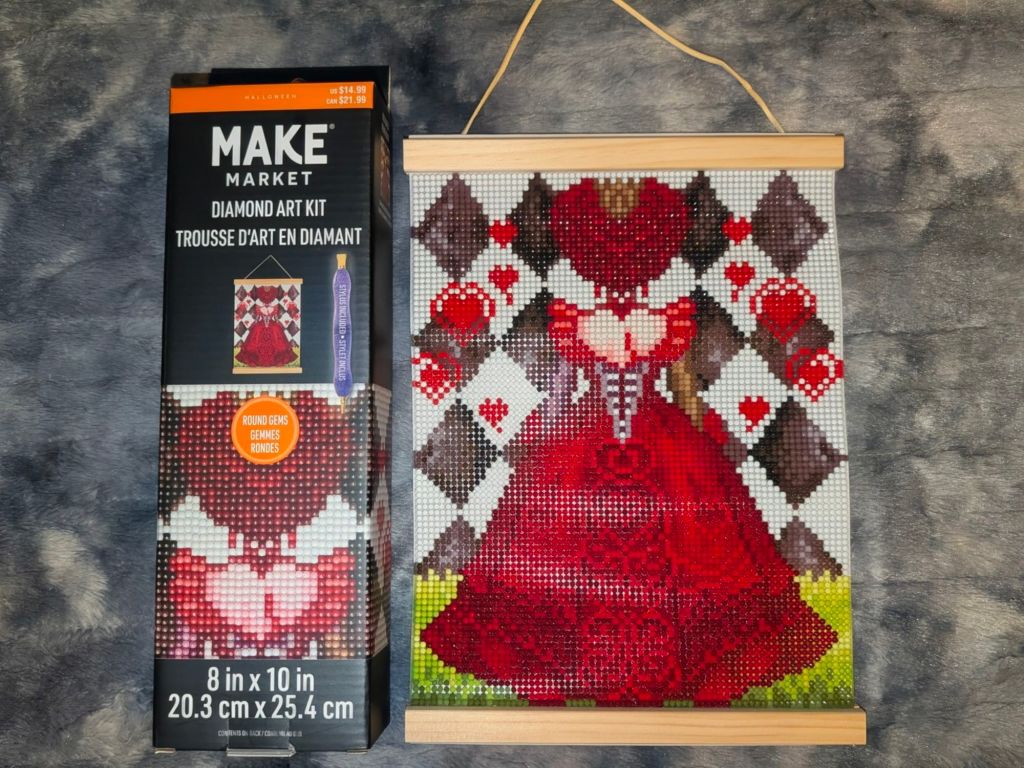
There are some that I bought that are Halloween diamond painting that I don’t really consider to be a Halloween theme because it is the Alice in Wonderland theme. There is the 16×20 diamond painting called Wondering which is the back of Alice. That one is a square Diamond painting, meaning the diamond drills are square and not round. The Red Queen 8×10 diamond painting and then I also have a box that has four 5×7 diamond paintings with the Alice in Wonderland theme called World of Wonders. So I will be bringing all three of these with me to the spring craft faire. I’m not sure anybody will want them, but I’m going to bring them anyway.
I have bought some Christmas diamond paintings from the Make Market brand from Michaels that I do not plan on selling. They are diamond paintings that I bought for me to make for our home. I already have way too many diamond paintings to make that I don’t think that I will even have time to make the two that I bought.
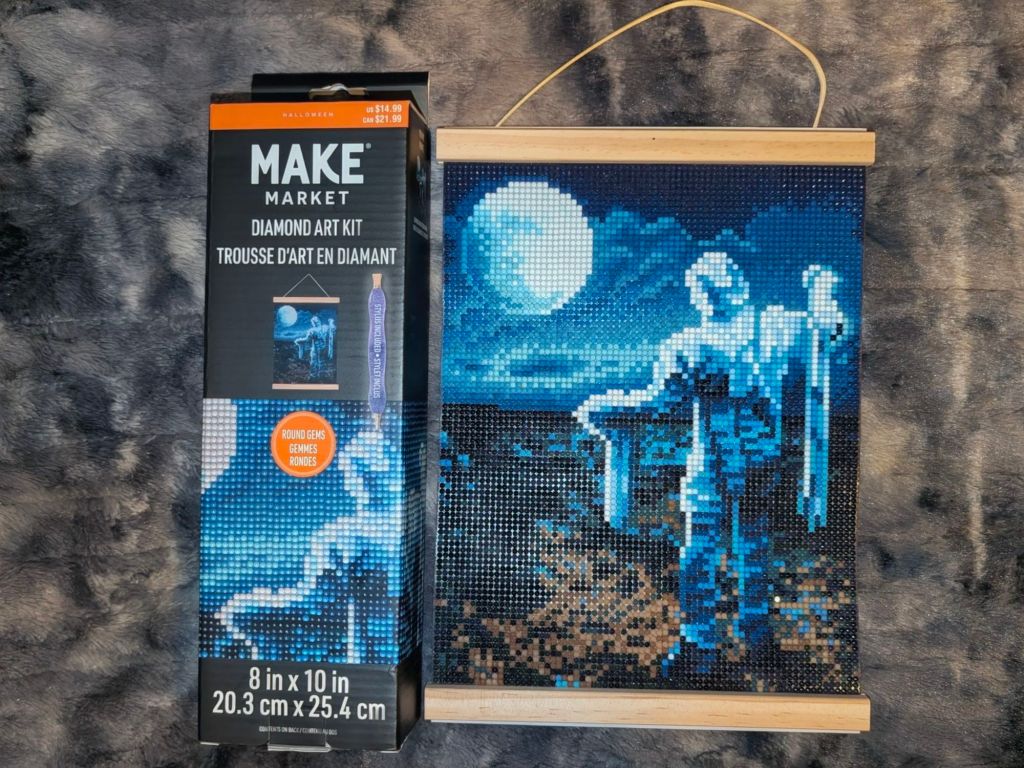
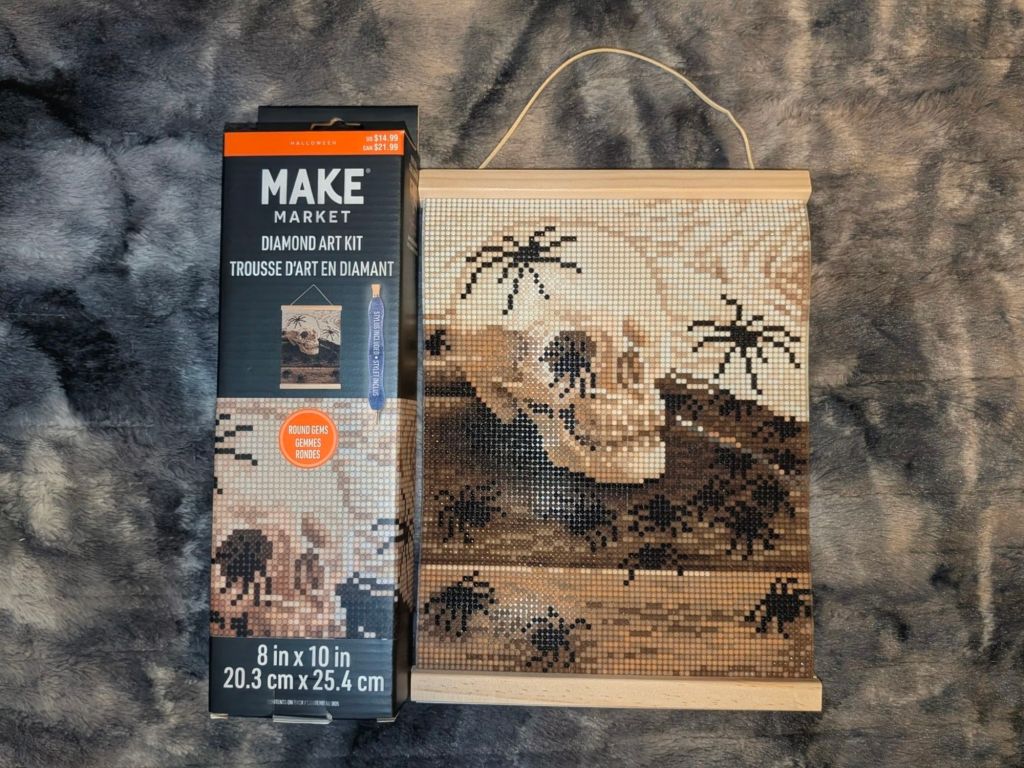
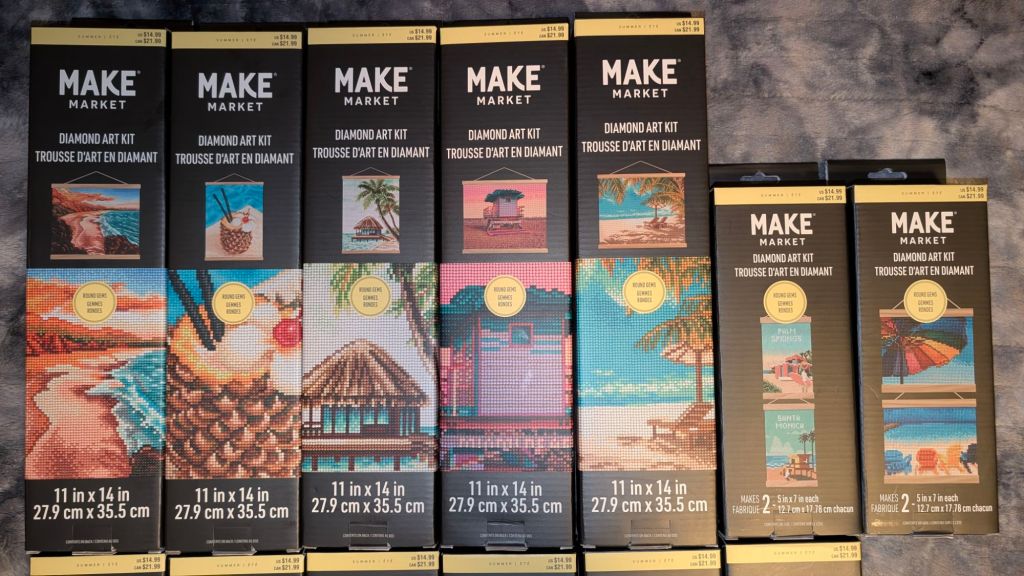
I bought all of these Make Market 8×10 Halloween diamond paintings to sell at a craft faire coming on October 25th 2025. I have made pretty much all of these except for 2. I’m still working on Neon Pumpkin and then I have Spider Skull to make and then they will all be finished. These are the ones that I’ve made so far. I put the image of the ones that are not finished in as placeholders. I will replace them when I make the diamond paintings. These are not the order in which I made them, I only put them in this order to match the order of the boxes in the image above.
I really do love Halloween and I love all of these 8×10 Diamond paintings. I did not think that I would buy any Halloween Diamond paintings because even though I love Halloween, I don’t really celebrate it much and I couldn’t see myself hanging any diamond paintings or any pictures for Halloween on my walls. That is until I saw what they had at Michaels in their diamond painting Halloween collection. I fell in love with pretty much every one of these diamond paintings no matter the size and I bought pretty much all of them. Not every single one, but pretty much LOL.
Yes, all of these will be at the craft fair and I have extras for the ones that I really wanted to keep for myself that I will make for myself if these sell. If they don’t sell, then I won’t make it. It can just sit in the box and then I’ll make it eventually if somebody else wants it. And then of course I will also add all of these that don’t sell to my Etsy shop so somebody can buy it online.
And yes, these all came with a purple stylus. All of them. I bought two of the Spooky Mushrooms and two of the Red Queen, so I have 12 purple styluses. Of course, I will offer that in the listing for the diamond painting if somebody wants it. I certainly don’t need that many stylus pens for making diamond art.
I have some 5×7 and some 16×20 Diamond paintings for Halloween that are not all finished and I will add a new blog post for those when I finish making them all. And I will also update those two Diamond paintings in this listing to replace the placeholders.
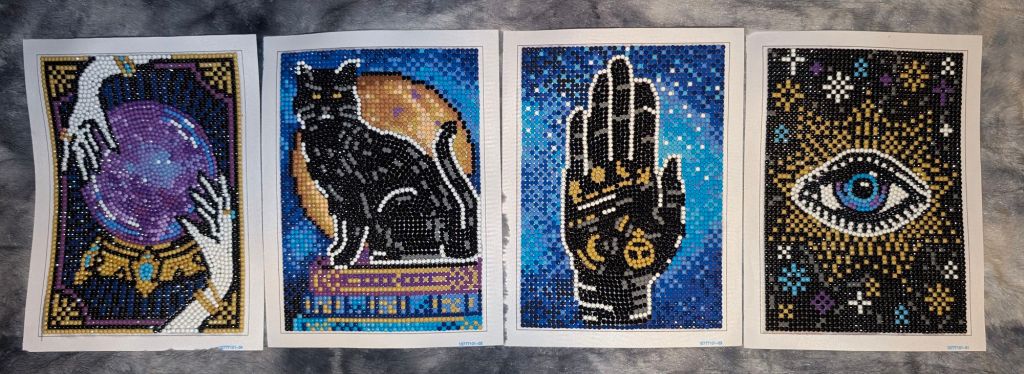
Well, I think I’ve officially lost my mind. After all of the summer Diamond paintings, I thought to myself there’s no way I’m going to buy any of the diamond paintings for Halloween from Make Market at Michaels. I like Halloween, but I’m not sure I want to spend a lot of money on Diamond paintings for them. I didn’t know how awesome they were and I did buy a few, but I limited myself to those few. Then my life partner suggested that the ones that I had already made I could sell at the craft fair and put in my Etsy shop and he said I should buy more of one particular set because they are the 5x7s and he thinks that those will sell because they’re small and they have more to do with the Enchanted Cottage store that we will be selling them at. It’s a mystical shop and they are mystical Diamond paintings, so it only makes sense that I doubled up this particular set.
I had also bought the diamond painting of the Witch Eye, which looks like the witch from The Wizard of Oz, or Wicked, take your pic. I had also bought and made the Red Queen which is an Alice in Wonderland Diamond painting and I thought that those 2 would actually be perfect to sell it at the craft fair. I made the Spooky Mushrooms for myself to go with my 16×20 Mushrooms Diamond painting, but I bought another one because I think someone would like that at the craft fair. Also, I’m bringing my bigger mushroom diamond painting because I think someone would want to buy it there. I want to keep it, but I can always make another one.
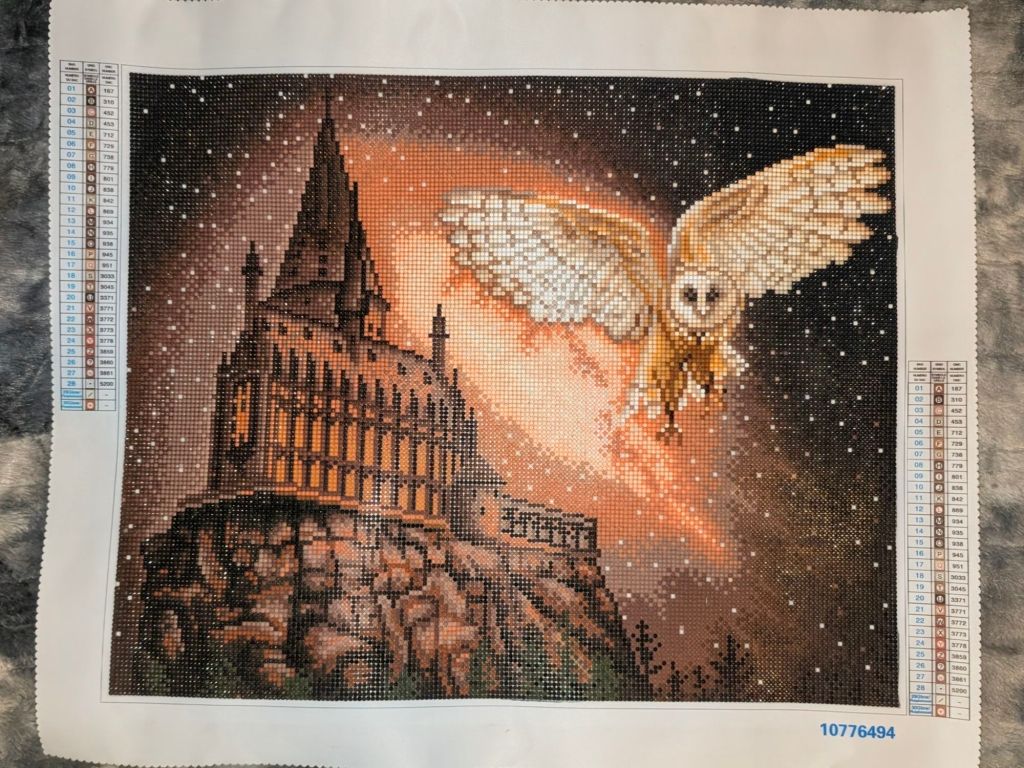
So, I had put the celestial kit in my shopping cart on the Michaels website along with some other of the 8×10 framed Diamond paintings like these and I was going to wait for the price to go down a little bit. I wanted them to go down to clearance prices because then I could buy a whole bunch of Diamond paintings, but I had a lot of the 8x10s and some of the 16x20s in my cart and I thought I’m already getting a really good price with the 50% off plus my senior citizen discount. So I think I’ll just go ahead and make the purchase now. Well, then I started working on the 16×20 Diamond painting of the castle and owl which I believe is like a Harry Potter thing. And my life partner said that someone would definitely want to buy that and I said well, I’m making this for myself. Then I got to thinking that he’s right, somebody would probably want to buy that one, so I had to place another order LOL. I actually ended up buying a bunch of Diamond paintings that I actually did not want to buy at all, but I ended up buying them because I was going to get free shipping on my cart over $49. Again, I was waiting for them to go on clearance, but then I noticed there were some that were saying that they are no longer available to ship and I was afraid that if I did not pull the trigger and make my purchase, then half of my cart would probably be unavailable.
So I took the Box images and put them all into one image to show what I actually bought. The first image is all of the 16×20 inch Diamond paintings from both orders. So I have the Castle and Owl as I said, and I bought another one. I only bought one mystery Diamond painting because I was afraid if I bought all four, they would end up sending me duplicates.
This next image shows all of the 8×10 Diamond paintings that have frames and also come with a purple stylus. So, I already have the Red Queen, Witch Eye and Spooky Mushrooms. I figured that somebody would want the mushrooms so I bought another one because I want to keep the one that I have. The one that has the skull and the spiders, somebody that buys buttons from my Etsy Shop actually wants that one, so I’m making it for her. I bought a second Red Queen because I want to keep one for myself.
This next image are of the three boxes that have the 5×7 Diamond paintings. The celestial on the far left is the one that I have and I bought a second one. The one in the middle is the regency set of 5×7 Diamond paintings that I thought somebody would definitely want to buy there. The one on the far right is an Alice in Wonderland themed set. I bought one in each order.
So I mentioned that I wanted to keep the Red Queen for myself so I bought a second one, and then this set that has four 5x7s, I thought somebody would definitely want to buy that at the craft fair, but I wanted to keep one for myself as well. The reason why is because I bought that 16×20 Diamond painting of Alice and I want to keep that for myself, so I wanted to keep all three of those to stay together.
It is worth noting that all of these Diamond paintings have round Diamond drills, except for two of them. The 16×20 one that has the spellbook and the bottles of potions and the 16×20 of Alice in Wonderland both have square diamond drills. Those two are actually sitting together in the image that has all of the 16×20 Diamond painting boxes.
I will definitely be able to finish all of the 8×10 and all of the 5×7 Diamond paintings long before the craft fair comes along, but I am doubtful that I will be able to finish all of the 16×20 Halloween diamond paintings before the craft fair. I’m almost finished with Castle and Owl, so I know that will be ready, and I’m fairly certain that I will probably be able to make two or maybe three of the other 16×20 ones. I’m definitely not going to be able to do them all. I think the ones that I will make for the craft fair will be the ones that I do not feel strongly about keeping. Any of the diamond paintings that I have already made that I bought a second one for will be on hold until after the craft fair to see if anybody buys them or not. If nobody wants them, then I won’t have to make them again for myself. There is no reason to waste any of my time making the second one for myself if I end up keeping them.
This is a lot of work, but I know I can handle it because I can make one of the 8x10s in one day, and I will have plenty of time to finish all of those long before I need them. Because I will be working on all of these Diamond paintings, I won’t really have time to make anything else for the craft fair. I do want to make some Halloween buttons because you can’t go to a craft fair in October and not bring Halloween buttons. Those I could do in a couple of hours.
Some of the other Diamond paintings that I made for myself will be coming with me to the craft fair because those are not seasonal which means I can buy the kit again to make the diamond painting again. All of the Halloween Diamond paintings are going to literally be discontinued when they no longer have any to sell. They do this every year apparently, so every Diamond painting that you see here will not be there next year. They might have another version of some of them, but they won’t be the same ones. I saw some images from last year and one of them was a 16×20 of the skeleton lovers and they looked completely different from the one for this year. They also had a 16×20 Diamond painting of the witch from Wicked and I really wish that I had gotten that one.
Of course, I will also be adding whatever I will be bringing with me to the craft fair to my Etsy shop because if somebody doesn’t buy something at the craft fair, they can get it from my Etsy shop to be mailed to them. So it doesn’t matter where someone buys them, I just hope someone buys them.
I really do enjoy doing this craft, but I am worried about the amount of money I’ve spent already to buy this massive amount of Diamond paintings that I have no guarantee anybody will want to buy. But that’s the gamble that you take when you buy craft items to make to sell at a craft fair or on Etsy. Everything is a gamble, and it doesn’t matter what it is.
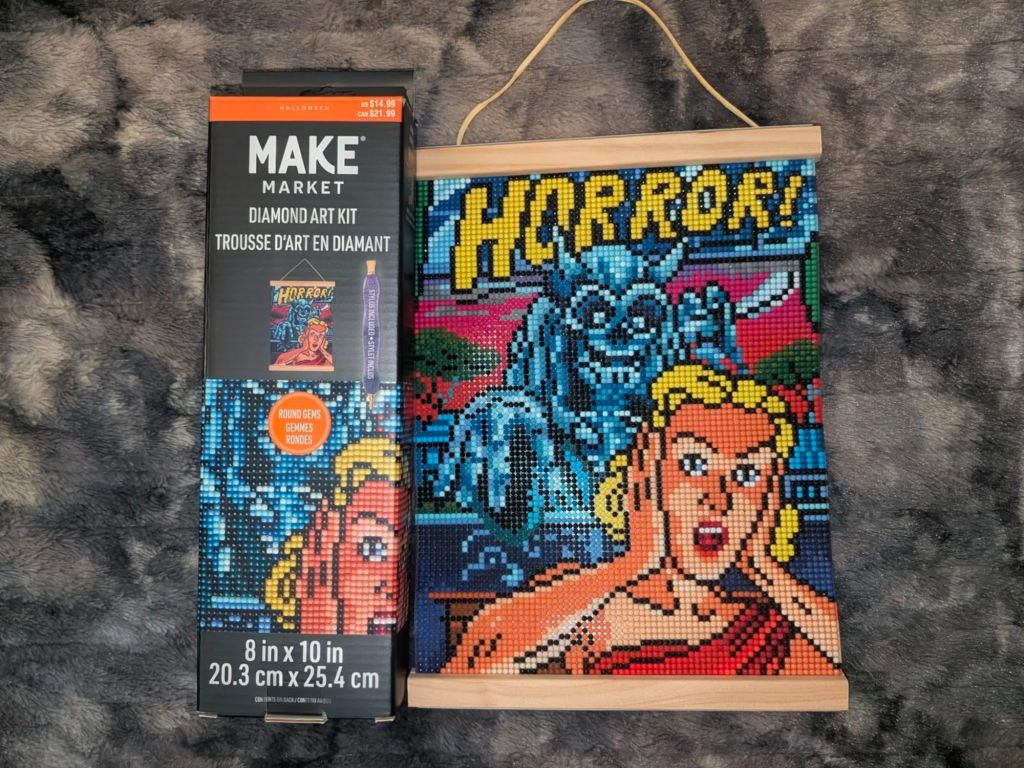
Update October 7, 2025: I thought I updated this but apparently I did not. I bought this for myself and then my life partner suggested I sell it at the craft fair, so then I bought another one for myself which I will make after the craft faire after all of the other Diamond paintings that I need to make as gifts for people. I may get this finished for myself before the end of this year, or I may have to wait until January, but I will make it for myself and it will hang in my bedroom all year long and not just on Halloween.
I bought some Diamond paintings from Temu when I first started Diamond painting back in April. I have since bought so many more diamond paintings from Michael’s craft store that will probably keep me busy for the next year or longer, but I wanted to buy some more rainbow and psychedelic type of diamond paintings to sell at the craft fair this coming October and also in my Etsy shop. I think these will work really well for the craft fair though because the craft fair is located at a place that sells tarot cards and crystals and Sage and they actually have psychics on staff on duty at all times to give readings to people. This is the type of a place that I believe these Diamond paintings would sell best at.
I think people are starting to think that my shopping for Diamond paintings is a little out of hand, but I’m not shopping for myself. This is not because of an addiction that I have to diamond painting, this is a business decision for selling the resulting product in my Etsy shop and at a craft fair. There’s a big difference in buying something that I want for myself because I want it, and buying something that I think that I can sell.
I have made two rainbow diamond paintings to sell at the craft fair and in my Etsy shop and I have four more to make in a box in my room, but I think these will make a great addition.
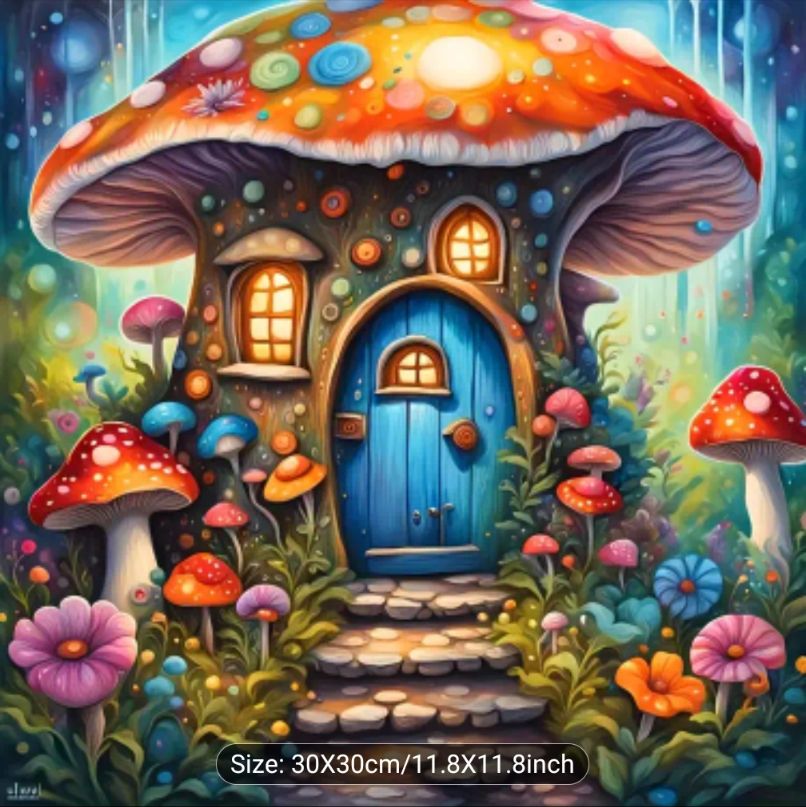
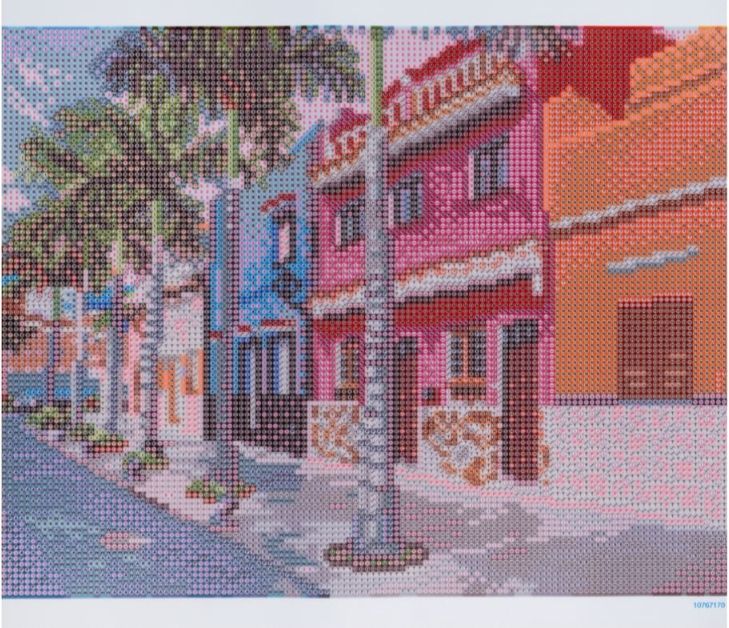
These Diamond paintings will be here soon in the mail, so I don’t really know how they’re going to look once they get here. I don’t know what the actual diamond painting canvas looks like because they only showed the pictures that I have above in this blog post. Normally I don’t like to purchase a diamond painting unless I know how it will look on the canvas with all the symbols in the squares or if it’s a printed graphic with symbols floating on top of the image, but I really liked these images and if I don’t find that I’ll be able to make these, then that’s fine. They can sit in a box and I will work on them another time, but I have a feeling I’m not going to have a problem making these.
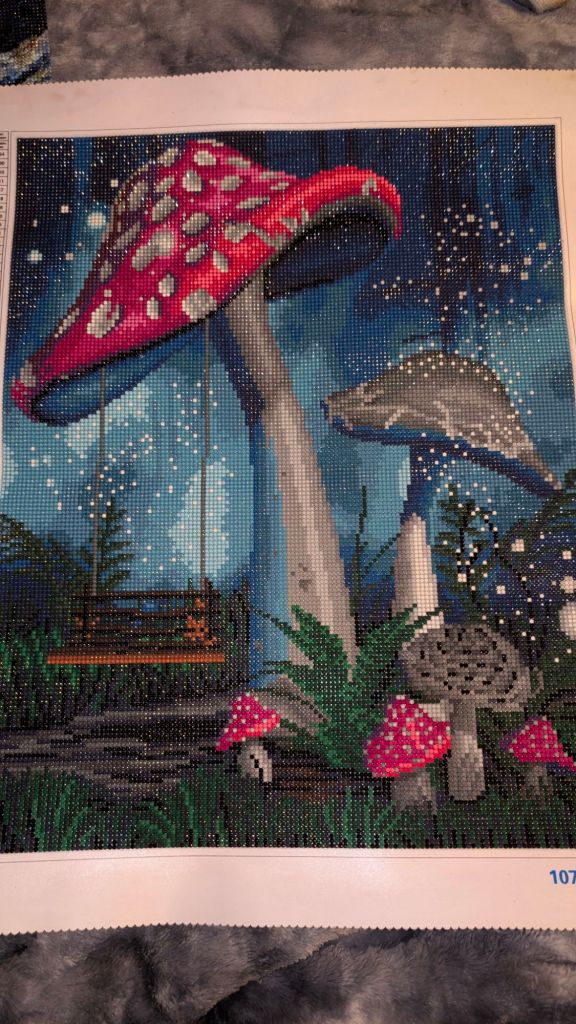
These Diamond paintings were ordered on August 18th, which was about 2 weeks ago. Normally you would have to wait that long if they were coming from China, but these are local, so they’re coming from Atlanta, Georgia in the USA. But because they were a pre-order, it’s taking a little longer. That’s okay because I have way more than enough work to keep me busy before these even get here which should be in a couple of days. After I receive these, I probably won’t even get to them for another couple or a few weeks.
I just think these look really cool and I love the colors and I love the mushrooms and I can’t wait to see how they look when they get here.
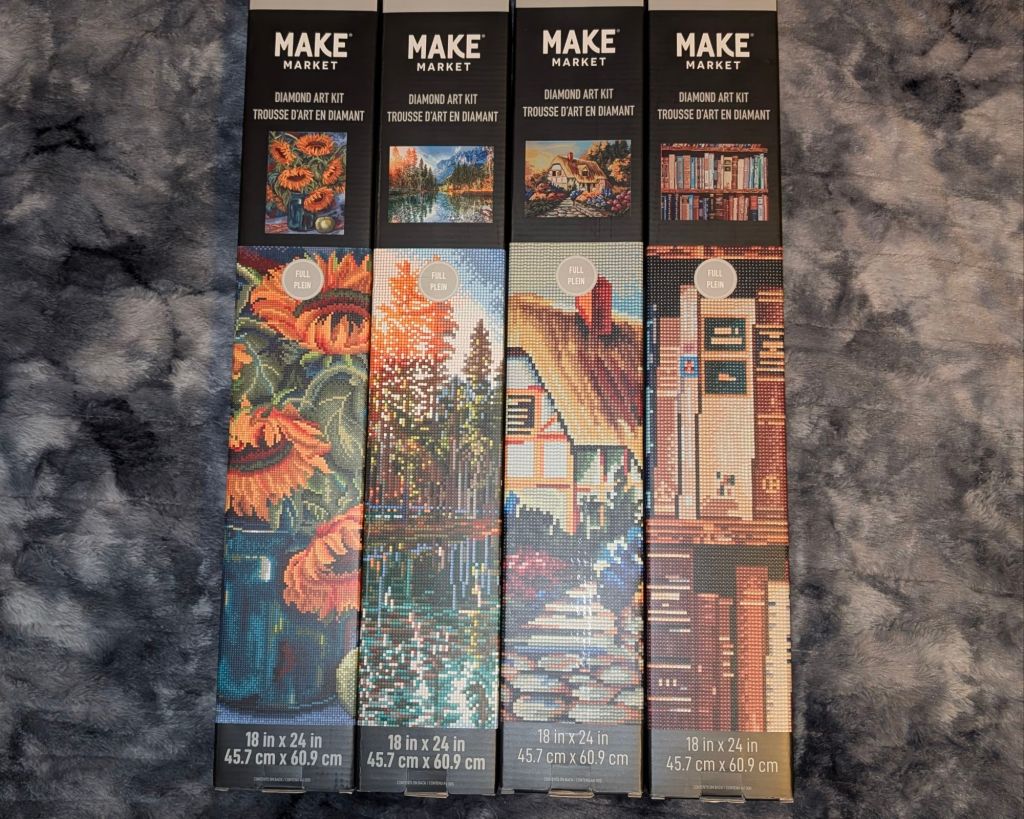
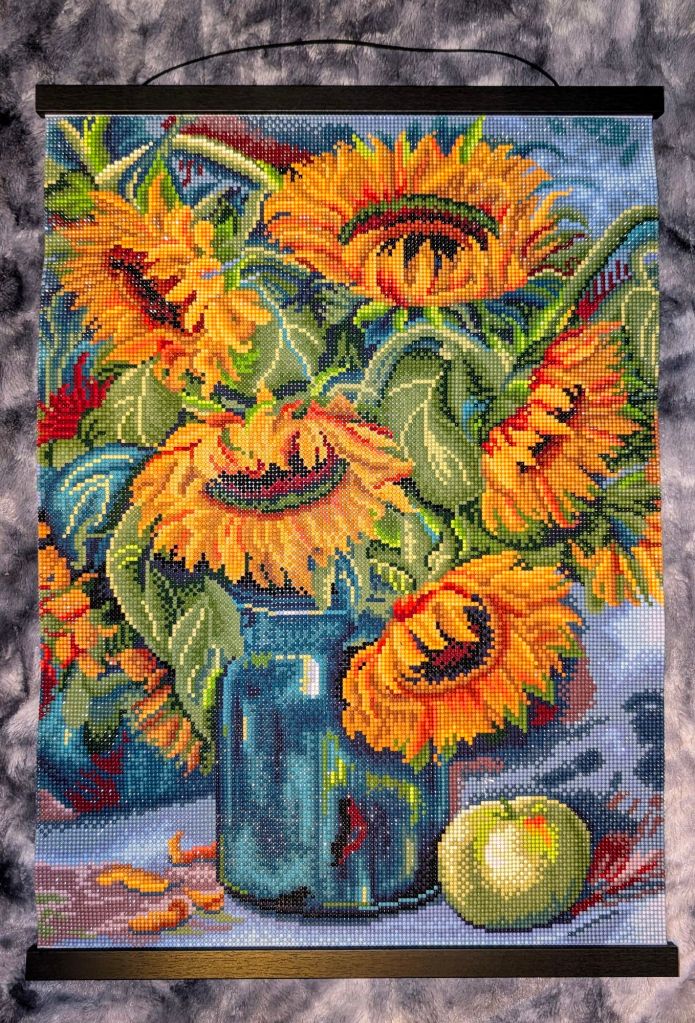
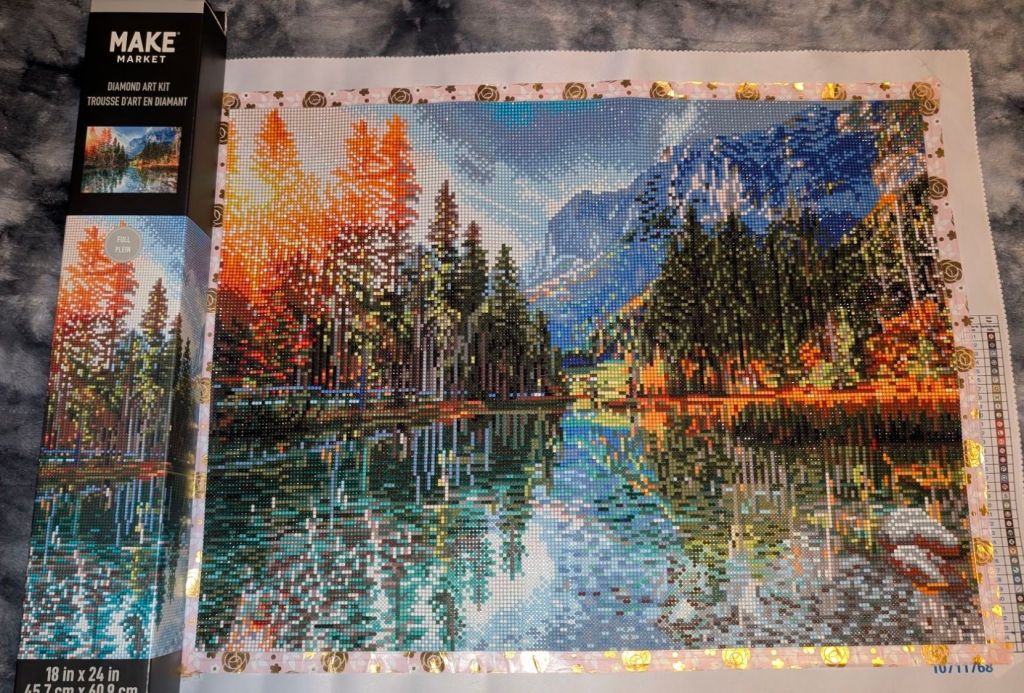
So starting with the 18×24 Diamond paintings, I actually have 2 of the Sunflower Bouquet, 2 Lake Forest, then 1 each of Cottage and Books. I’ve already made one Lake Forest and that one is hanging in the living room, but someone also wants the Lake Forest and so I bought another to make. I wanted the Sunflower Bouquet for myself, and I made it, and then I sent it to someone in Idaho. So I bought another for myself and now somebody wants to buy it, so I bought a third one. So technically because I don’t have the one that’s in Idaho, I only have two for now.
The 16×20 there is Mushroom, Wheat Field by Vincent Van Gogh, Skull, Pagoda, Cliffside and a Halloween one called Castle and Owl. I have already made the Mushroom one and I’m currently working on Wheat Field.
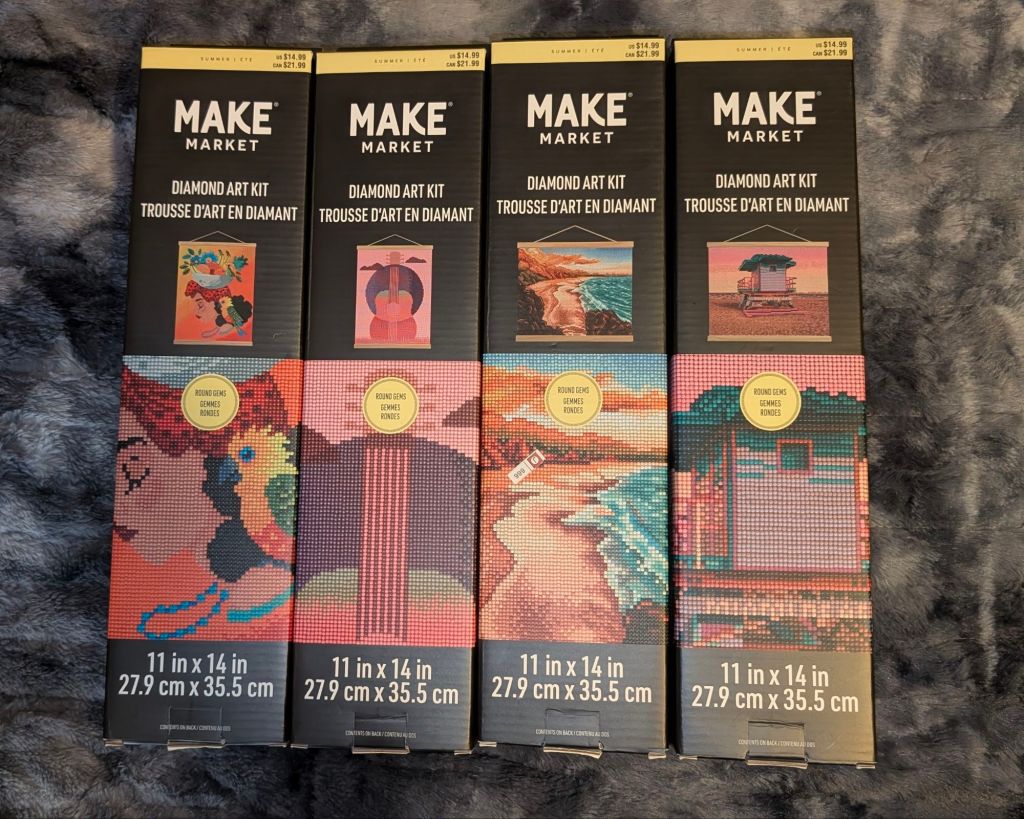
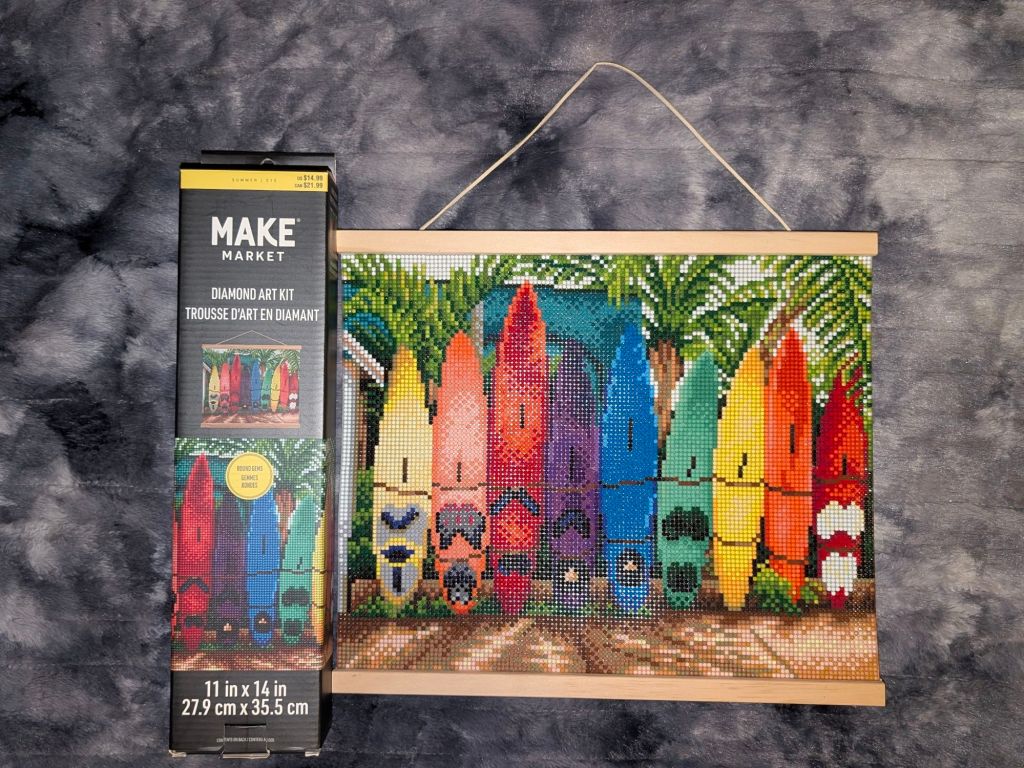
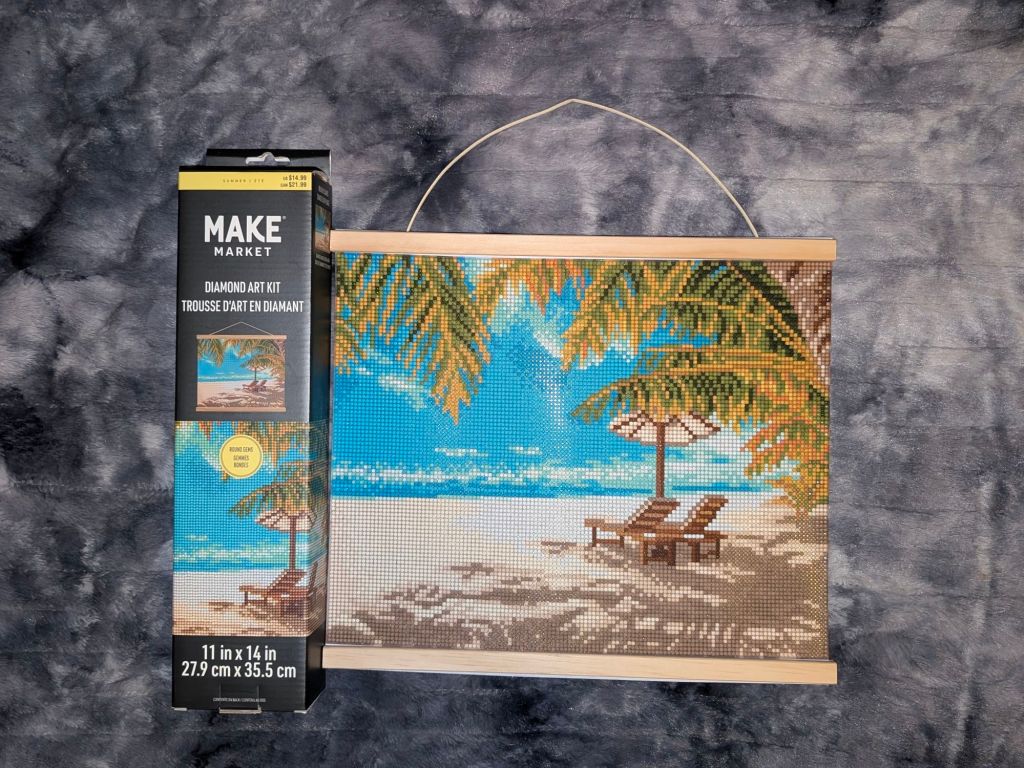
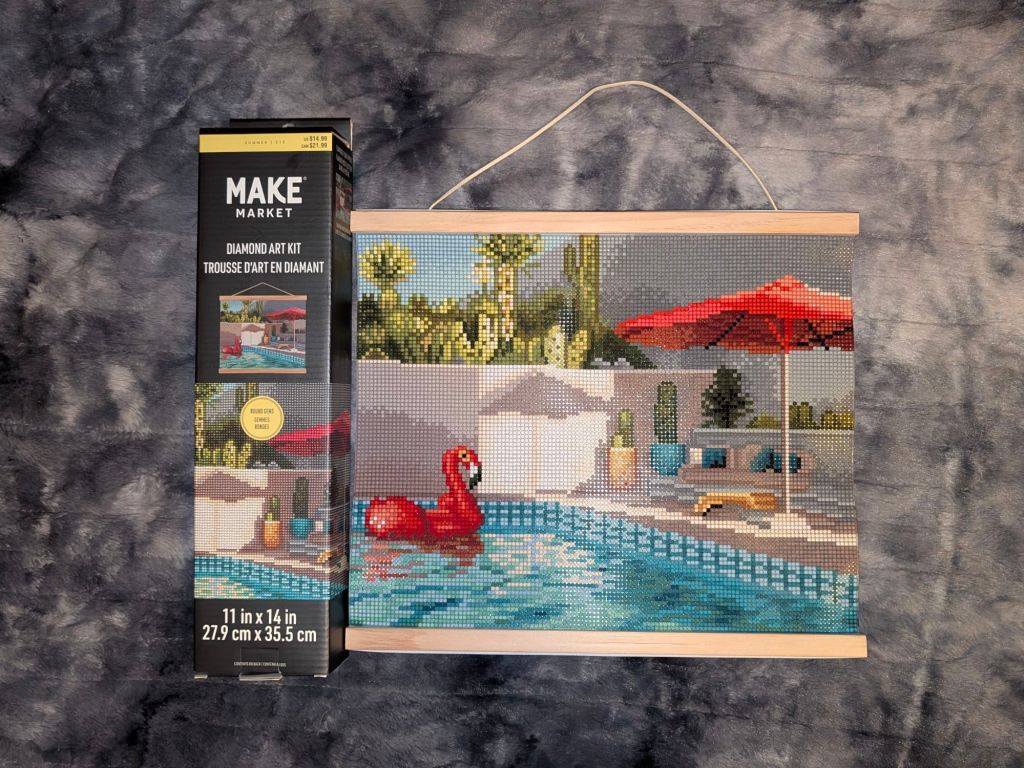
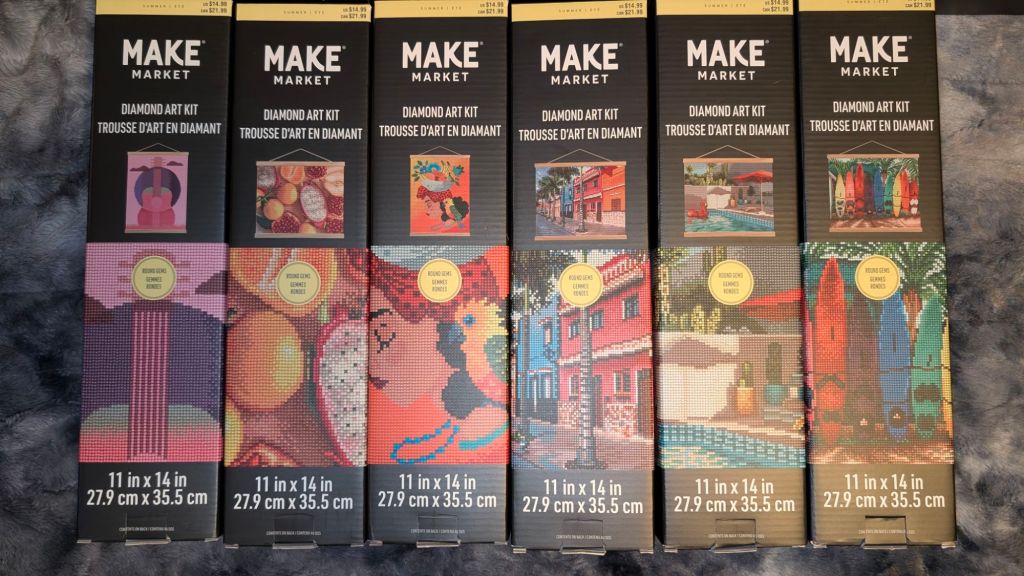
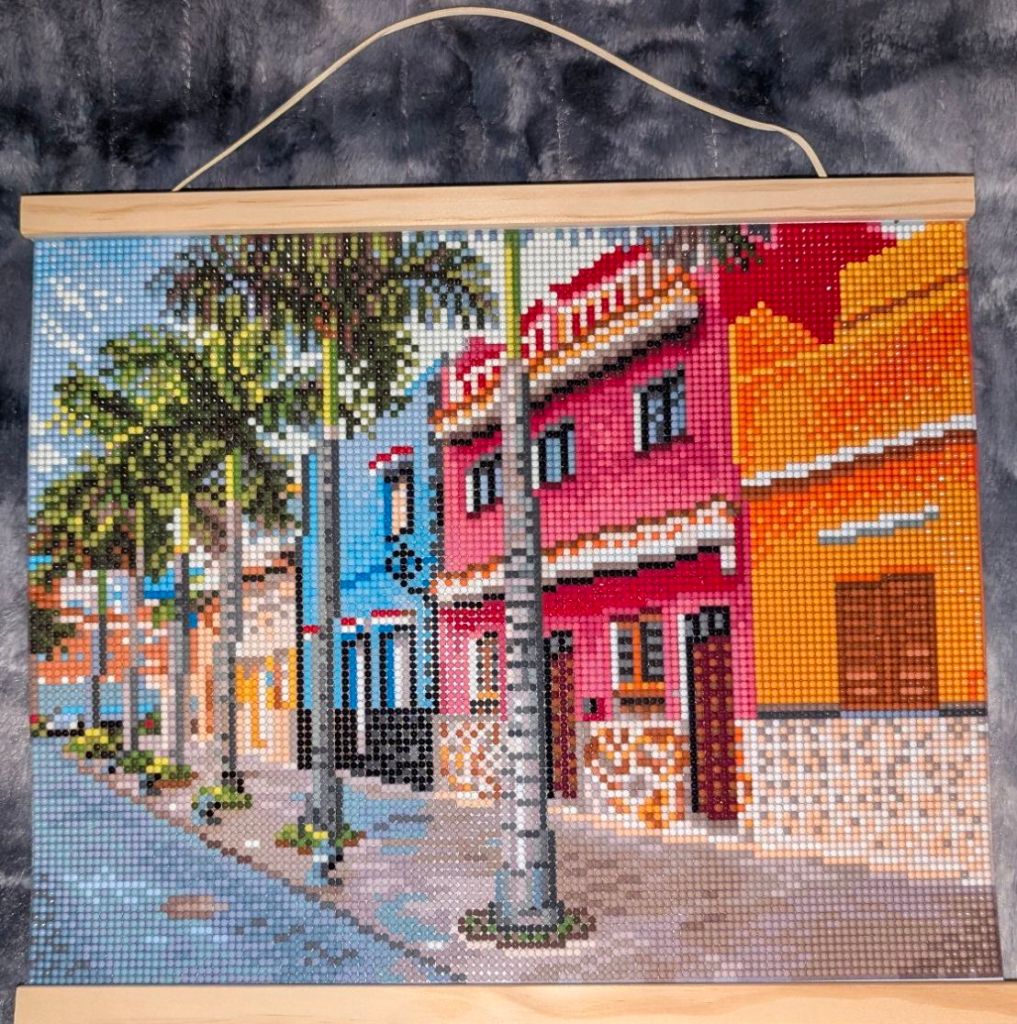
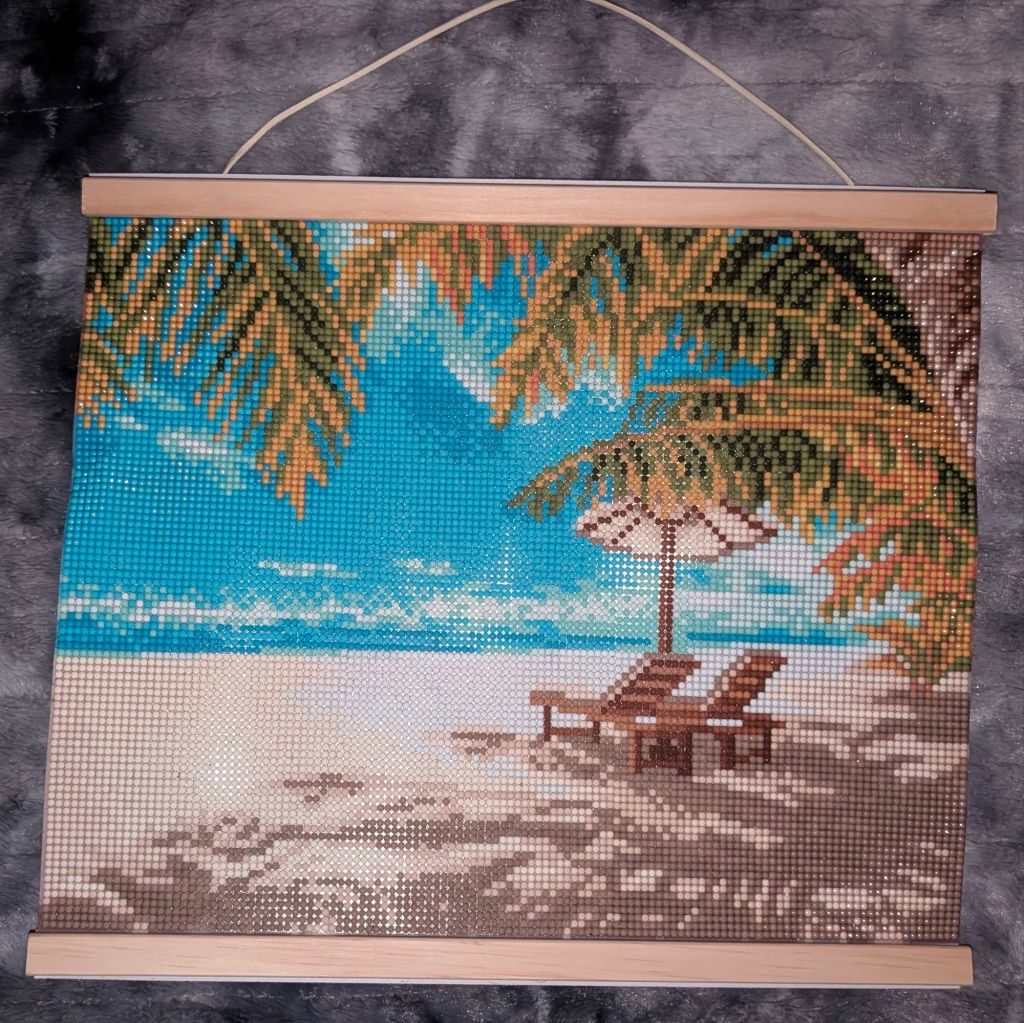
The 11×14 are Palm Tree Hut, Flamingo Float in Pool, Pineapple Drink, Colorful Street and Sun Fruits. All of these have been made and are in my Etsy shop. I had two more called Rainbow Surfboards and Beach Chairs and those both sold in my Etsy shop.
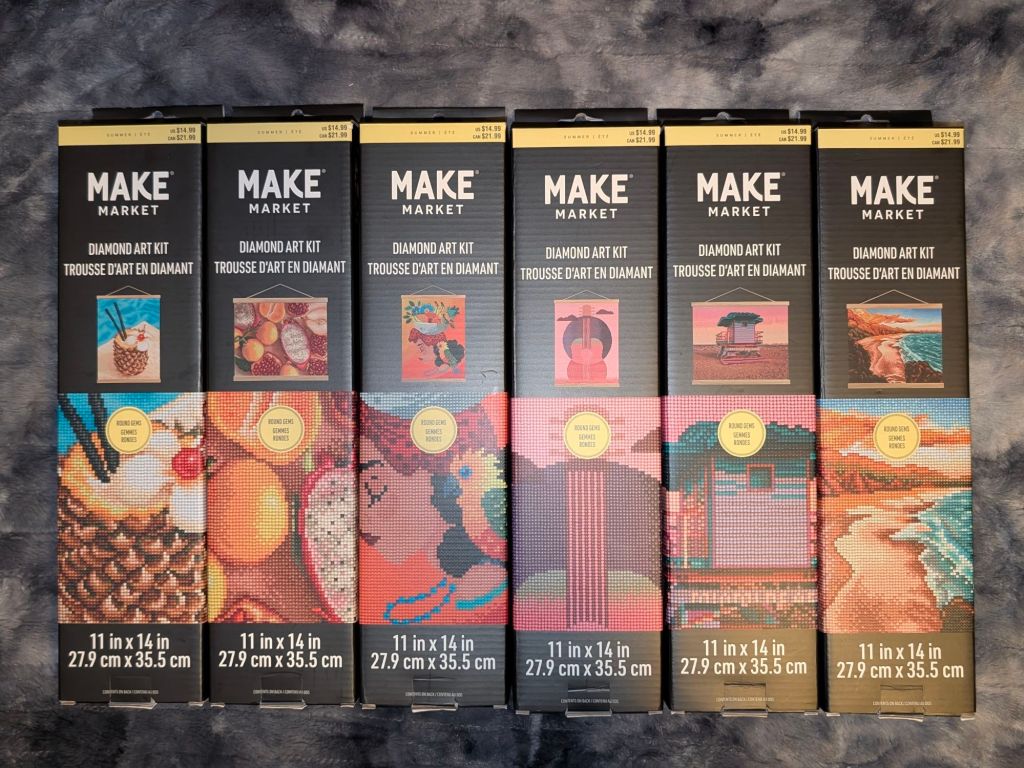
The next picture of the 11×14 summer collection are Girl with Bird, Pink Guitar, Sunset Beach and Lifeguard Stand. I would like to make all of those for my Etsy Shop except Sunset Beach. I want that one.
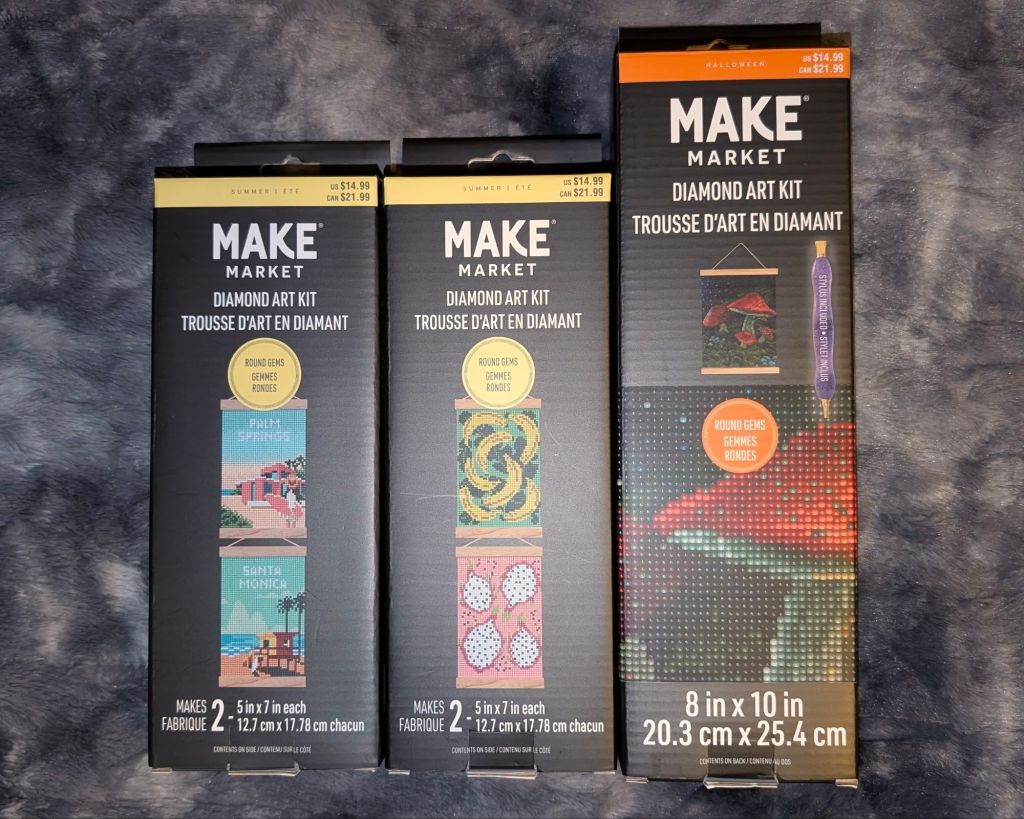
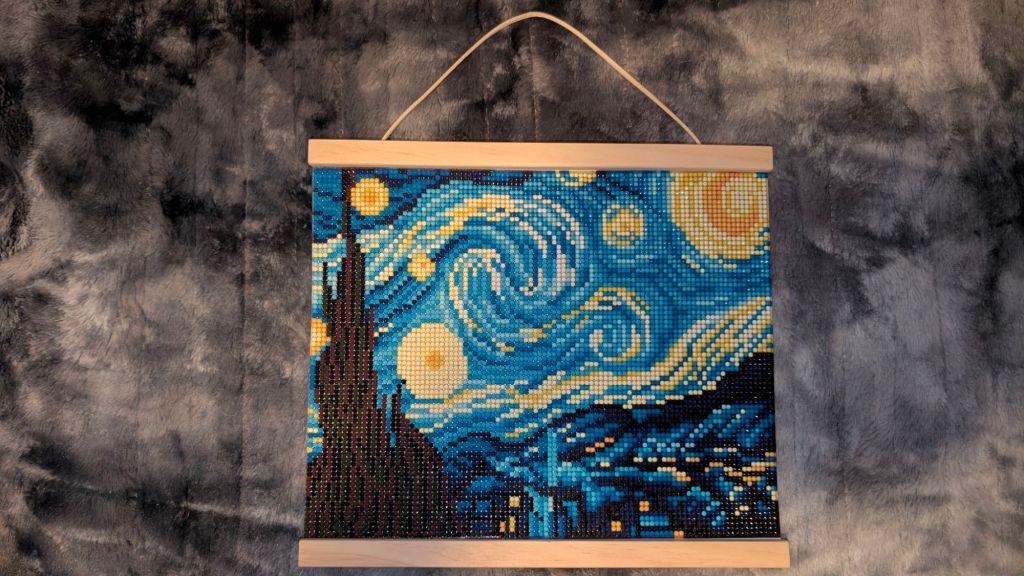
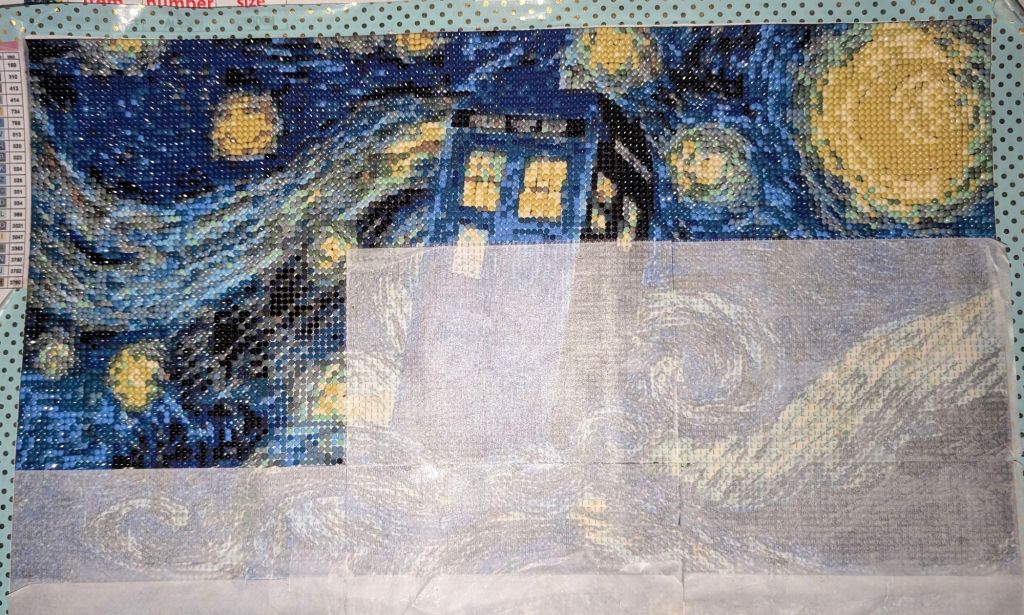
Then there are the two little boxes with the two 5x7s in each that are Beaches and Fruit. Then next to that is Scary Mushrooms which is a Halloween 8×10. Also in the next picture which is the picture of the actual Diamond painting is Vincent Van Gogh’s Starry Night which is a 8.5×11 diamond painting. I don’t have the box anymore because I sent another diamond painting to someone in that box to protect it during shipment.
This is a lot of Diamond paintings, but that’s not even close to the amount of diamond paintings that they still have available for me to buy. Of course I am trying my best to resist buying any more, because I need to make them before I should buy more.
Right now I am currently working on an Amazon Diamond painting that is being made specifically for a craft fair coming in October, and then if still available will go in my Etsy shop. I have four more Amazon and 4 Temu ones coming that I want to make for the craft fair and I’m making those during the day in the living room while I make the bigger Make Market ones at night in my bedroom. Like I said before, the bigger one that I’m making right now is Wheat Field, but when that is finished I will work on both of the Sunflower Bouquet Diamond paintings one after the next. I will then have to work on Books because that is going to be a Christmas gift that will go to my aunt and uncle in Texas.
As for the 18×24 Cottage and the rest of the 16×20 Diamond paintings, I will eventually get to them. There is absolutely no rush because they’re not going anywhere and they’re not going to anyone in particular. They can sit around until I get to them even if that means after the new year. I can only work on so many things at a time and I have other things that I need to do other than Diamond paintings during the holidays. I have to work on Halloween box cards, Thanksgiving box cards and Christmas box cards and those will take a long time to do. That’s going to take away from working on Diamond paintings because I’m going to work on box cards all day long to get them done faster.
There are a couple of the Halloween Diamond paintings that I would love to get, but they are the smaller 8×10 ones because I would like to buy them as gifts for my Etsy Shop’s large purchases. I made the scary mushroom one in a couple of days, So I don’t think it would take too long to make a few of those to have them ready to send out as a free gift. The same goes if they have those same size ones for Christmas. Of course, if I have those made before the craft fair in October, I will sell them there.
I would have loved to have made some of the 16×20 Diamond paintings to sell at the craft fair, and I will if I have time, but I don’t think I will have much time. I do have places picked out in my bedroom that I would love to hang these Diamond paintings for myself. The Wheat Field is going to go near my bed along with the Starry Night next to it. I have a space picked out for the Sunflower Bouquet which is going to replace my pez dispenser rack. And then the Cottage is going to go above my television because I would like to remove the rack that’s up there that has nothing but tchotchkes on it that do nothing but collect dust. I would rather have artwork there instead. Then there is another wall in my bedroom that has another rack hanging on it that I would like to remove to place a couple of diamond painting for the same reason. I was thinking of putting the castle and owl there. That is a Halloween diamond painting, but it doesn’t have to be because it looks like a Harry Potter image. That I would have all year long on the wall. I may put Cliffside or Skull above or below that and Pagoda in the hallway. Whichever I don’t hang with Harry Potter will go in the hallway. Also, the Mushrooms and Spooky Mushrooms are in the hallway.
Of course, there are some more Diamond paintings that are still in my Michael’s wish list, but as of now I don’t know where I would even put them even if I did have them. There’s only so many spots on the wall in my bedroom that I can put them. I don’t think there is any room for any Diamond paintings throughout the rest of the house because there’s artwork on every wall. Lake Forest is in the living room hanging above the organ, that is the only space that was available for a diamond painting in the living room.
There will be another craft fair in the spring, and of course I will most likely be making Diamond paintings all day long like I am now that I can bring with me to the craft fair that will hopefully sell. I think that would be the only purpose for buying any more Diamond paintings at this point. I really have to draw the line somewhere.
I have now been Diamond painting for 4 months this year, and so far I’ve been pretty happy and very successful as far as I can see from the looks of my diamond paintings. But the one thing that I’ve been doing that is probably not as successful as some people might think is that I’ve been using a stainless steel grid that will help me to make sure that all of the diamond drills are completely straight every single time. However, that time has come to an end because I am getting a little fed up with the quirks of the grid.
I place the grid on top of the canvas so that I can see the letters, numbers, or symbols on the canvas and the grid sticks to the canvas with the glue, and then you run the brayer over it to make sure it stays on the canvas, and then you start putting your diamond drills inside of the little holes in the grid. Well, that works out most of the time, but there is a thing that happens occasionally that kind of destroys the grid. As you’re popping the diamond drills into the metal, it will sometimes make a snapping sound which could either break the diamond drills or the actual grid because I have come across so many times that my grid is falling apart and the metal pieces are poking me in the finger and it hurts and it has made me bleed and it makes it impossible to use the grid in those spots.
What ends up happening is that the pieces of metal start curling upward and then you have to just cut them off, or sometimes they end up twisting off themselves and they get embedded into your skin and it hurts. But mostly I just end up taking them off the diamond painting and then eventually throw them away.
I have bought several of these, and every single one has broken except for the one that I have now that I’ve only had for a few days, and then I have one that’s still on its way to me from China. I bought a grid on Amazon from the same exact retailer I’ve bought from before, and for some reason it is coming from China instead of America. So I got tired of waiting because it’s been like 3 weeks and so I bought another one and they sent it and I got it in 2 days, but yet I’m still waiting for the one from China which will be here on Monday. I’m positive I’m going to end up having to pay three times the amount in tariffs, which I am not at all happy about considering I’ve already given up on the idea of using them.
I think I did a pretty good job considering I did this whole section without using the grid. I put all of the diamond drills in the circle and then occasionally they would come out of the circle and they would start looking crooked, so I would have to use my straightening tool on one of my stylus pens and it would straighten everything out again. That’s the thing that takes a little longer and it’s constantly making sure everything is aligned perfectly. I am a perfectionist and it is frustrating to have something not perfect.
The diamond paintings from different companies are different. The Michael’s Make Market diamond paintings, all of the images have a square with the color and then a circle with a lighter color on the inside with a letter, number, or symbol inside the circle. Every time I used the grid, it would cover the square, so I couldn’t really see what color it was, but I could see the symbol. Every now and then the symbol might look like another symbol. Like for example, the 6 might look exactly like an 8 and then I wouldn’t know unless I looked at the color around the outside edges of the circle, which means I would have to remove the grid just to see the color. So that is actually a huge disadvantage to using a grid. Other Diamond paintings that I’ve made have a different way of doing things where there’s no circle at all, it’s just a square with a number, letter, or symbol inside of it. There have also been some that I’ve made that have no squares and no circles, but just a printed pattern with letters, numbers, or symbols written all over it. Those I actually find more frustrating.
If I’m being honest, I prefer the Michael’s Make Market diamond paintings because it’s easier to make with the symbols on the canvas and the fabric is much better than the ones that I’ve gotten from Amazon and Temu. The Make Market brand canvas is polyester and it feels like the one from Amazon and Temu are made from plastic covered paper. I also enjoy the diamond paintings from Michaels Make Market brand that come with their own frames because then I don’t have to worry about buying frames. I have bought several of their summer Diamond paintings and they all have frames around them.
I have many more of these summer Diamond paintings and I have put them in my Etsy shop for sale. Two of them have already been sold and the two little 5×7 ones with the rainbow umbrella and the Adirondack chairs we’re given away as gifts for a thank you for purchasing my diamond paintings along with other things in a very big order. I still have the two that I’m working on now and then I have four more summer diamond paintings to add to my Etsy shop. These are the ones that I have coming. The two on the left are the ones that I’m currently working on. I work on one in the living room from when I wake up until about 5:00 p.m., and then at 5:00 p.m. I come into the bedroom and work on the other one until bedtime. The one with the pineapple drink is my daytime and the one with the sun fruits is my night time. After I’m finished with those two, I’ll go to the next two and then the next two, and then I’ll be finished with the summer ones I have from Michael’s. To be honest, I did want to sell the one on the far right with the beach. I love that one.
I have made 2 of the larger Michael’s Make Market diamond paintings that are 18 inches x 24 inches and 1 that is 16 inches x 20 inches. I don’t want to sell those. I actually gave the Sunflower Bouquet one to someone who lives in Idaho, the Lake Forest one is hanging in our living room, and the Mushroom is waiting for it’s frame which will be here on Monday. I have a second Sunflower Bouquet diamond painting that I intend to make again for myself.
I never really thought of myself as a person who cares about art that hangs on the walls. It’s never really been an interest for me until I realized how many of those diamond drills are left over that I could use in my other crafts. Now all of a sudden all I care about are diamond paintings because I can make them. Buying them in a shop is not interesting to me, but making a painting is a whole other trip for me. It’s like all I can think about now is Diamond painting and how beautiful they are when they’re finished and how I can’t wait to see them everyday on the walls in my home.
And now that I’m learning how to make these Diamond paintings without using a stainless steel grid, it makes it feel even more special when I can make them and they still look good after I finish a square or whatever section I do.
Well, wish me luck on making the rest of my diamond paintings without using my grid LOL.
I started Diamond painting this year in April and I have made around 16 Diamond paintings so far. This is a diamond painting that I bought from Temu in April and I received it on April 28th.
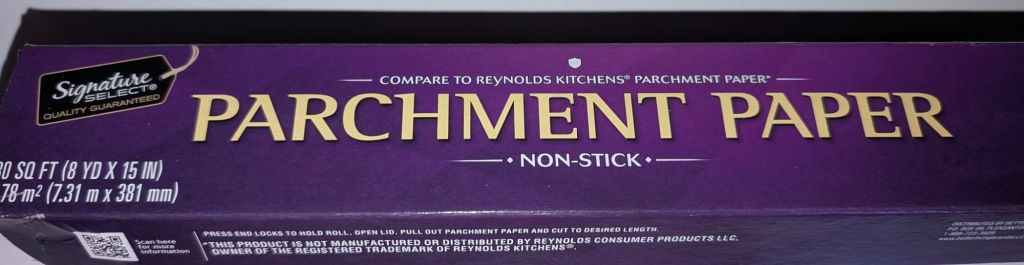
I finally got around to it in mid-july and I had run out of the silicone release sheets that I bought from Amazon. I had seen a lot of people say on YouTube and on tiktok to use non-stick parchment paper instead of the silicone release sheets from Amazon because it’s cheaper and it works just the same. So I went to Albertsons and bought their brand of non-stick parchment paper, and this is what it looks like.
I had put this parchment paper on two different diamond paintings that I’ve mentioned in previous blog posts. Anyway, it ended in disaster but I was able to peel off the parchment paper and continue working on the diamond paintings. In fact, I have finished the mushroom Diamond painting which was the second Diamond painting that I put the parchment paper on. This has been blogged about with images. That’s not what this post is about.
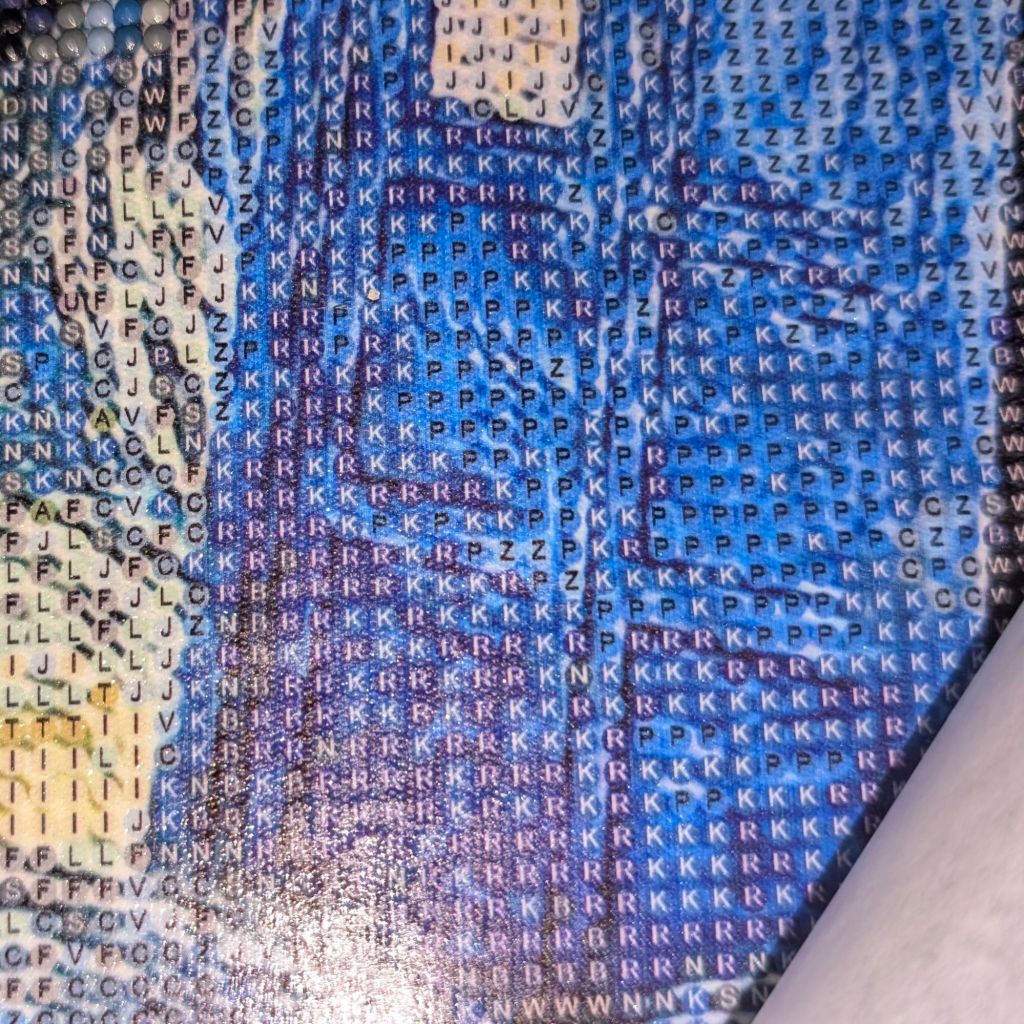
So when I started working on this Diamond painting with the Starry Night Police Box, I was having issues because this was a different kind of diamond painting. Normally the diamond paintings that I have made in the past have had like a square with a color and a circle with a symbol in the middle of it and that would tell you where to put the diamond drill. Every Diamond painting that I’ve made so far has been like that. This one on the other hand is so different. This one has a graphic printed on the canvas and then the symbols on top of the image with no squares, no circles, it’s just there and you have to put the diamond drills in there.
As you can see, the symbols in this case are all letters and are sometimes difficult to see. Letters are on top of a color, but it’s just different. I mean, I’m not having trouble with it because I have a light box underneath it and so I’ll be able to see the letters clearly, but it’s still difficult to do this one. It’s doable, it’s just weird and different.
One other issue that I’m having is that when I pulled off the parchment paper, it pulled off a lot of the stickiness. So there were some spots where there was no stickiness and I had to buy a glue called Dotz Stick. I poured the glue on a section that didn’t have any stickiness at all and it made it really sticky. But tonight I was working on this section on the left and I was having so many issues with the diamond drills moving around too easily and also every time I would put my finger on the diamond drills on the very top row that I had already done, they would come off in my hand. Like literally I would pull my hand up and the diamond drills would be stuck to my fingers.
I was starting to feel like this Diamond painting is not going to happen. I’m going to have to give up on this because this is not easy and the diamond drills are coming up too easily when they should be stuck on. I should be able to scratch my fingers on the diamond drills and they should stay put. But all I have done was just rest my fingertips on the diamonds and they come off on my fingertips. My fingertips are not sticky. I’m not Spider-Man. I don’t understand why this is happening other than the fact that the parchment paper removed more stickiness than I thought it did. I didn’t know that this was an issue when I made that top part.
So tonight I did the 4×6 section that you see down below and tomorrow I’m going to do the 4×6 section that is to the right of that section, but I added the dotz stick glue to that entire 4×6 section and then let it dry and then put the silicone release sheet back in place. Tomorrow when I start working on this again I will see if it worked and if it’s really sticky and if the drills don’t come off. If that’s the case then I’ll have to do that throughout the whole rest of the diamond painting and just pray that my fingers don’t make any more of those Diamond drills come off that I’ve already put on there before.
I am sure in the entire history of Diamond painting in the last 15 or so years since it was invented that this has happened to someone. Has this ever happened to you, reader who is reading this right now? Let me know because I want to know that I’m not the only one that is going through this.
I just finished making this Diamond painting called Lake Forest which is a Make Market diamond painting that I bought from Michael’s. This Diamond painting only took me 9 days to complete.
I mentioned this in a previous blog post that I was going to make this diamond painting in 9 days. I actually couldn’t work on it on Thursday, but my total time working on this diamond painting was in fact 9 days. I had 18 sheets of silicone release paper on the diamond painting, and I worked two release sheets a day until it was finished.
These Diamond paintings by Make Market are just so fantastic. I know I keep saying this, but it’s so true. This diamond painting looks like an actual picture or work of art from an actual artist. It doesn’t look as pixelated in the image above as it does when you look at it up close because you can see the pixelization which is basically every Diamond drill is a pixel. But when you are looking at it from a distance, I could barely tell that it’s a diamond painting.
I seriously do not know how they do these things. All of the make market Diamond paintings that I have done so far look like actual photographs. Even the 5×7 Diamond paintings that I made for summer that have the graphic of a rainbow umbrella, and the Adirondack chairs. They look so realistic. And then of course I also have the beach scene and the rainbow surfboards and they looks so real.
There’s so much detail in the palm trees and the shadowing of the palm trees on the sand in the beach chairs and then also in the surfboard diamond painting you can see like a little shack to the left and then of course you see all of the Palm leaves. And I mean, come on you have to look at that umbrella and think that it is taken from an actual picture. The Adirondack chairs do look a lot more fake and pixelated, but they still look great.
I am just so in love with Diamond painting and I’m just so fascinated by the whole thing and the whole process of making the diamond paintings and just the look of all of the graphics. This is probably by far, for me anyway, the best craft I have done in my life.
My next daytime project is the one that is the pink flamingo float in the pool and that one is halfway done, and I was going to do the bigger one that is called Wheat Field by Vincent Van Gogh in the bedroom, but I’m already starting to run out of space in my nine drawers with Diamond drills, and I have one drawer filled with diamonds for the one that’s called Starry Night with Tardis that I bought from Temu many months ago. I stopped working on it because it was causing me issues with the parchment paper being stuck to it. I have added the “Dotz Stick” Diamond painting glue to a small area of that one where the parchment paper took away the stickiness, so that should be good to go tomorrow night when I start working on it. This one I decided not to use the stainless steel grid that allows me to perfectly place all of the Diamond drills. I don’t think that the grid works for this Diamond painting. There are actually a couple where I won’t be able to use that grid because it’s too big for this diamond painting. So these ones that the grid doesn’t work with, I will just do it freehand.
So here you can see where I’m at in both of these Diamond paintings. I’ve been working on the flamingo float in the swimming pool for 3 days during the day in the living room, and even though you can only see the top half, look at how realistic it already is. You can clearly see the umbrella and it looks so realistic and then the cactus behind the wall. And then the Tardis with the starry night looks pretty good for being all freehand. And just like with the ones that I do at night, I will do two of the 4×6 silicone release sheets per night until it’s done. Then I’ll have an empty drawer that I can use for the Wheat Field, which I cannot wait to start on. It’s funny because Starry Night is Vincent Van Gogh and so is Wheat Field. The only difference is that the starry night one has the Tardis from Doctor Who. Can you imagine the Tardis being in the Wheat Field painting? I’m actually curious to know if they made a graphic that has a Tardis in the Wheat Field painting. I’ll have to research that, but not too much because I already have enough on my plate already as it is. Also, can you imagine what Vincent Van Gogh must think of all of these paintings with the Tardis in them?
When I first started Diamond painting in April this year, I had no plans on making Diamond paintings to sell, but, I didn’t rule it out entirely. My main focus was to collect the leftover Diamond drills for using in my papercrafts and if I found that I liked making the diamond paintings, then perhaps I will sell the product that came from it. My Etsy Shop focuses mostly on things that are rainbows because it is a gay Etsy shop and rainbows are a big part of the gay community, so, I like to make things with rainbow colors to sell to people in my community.
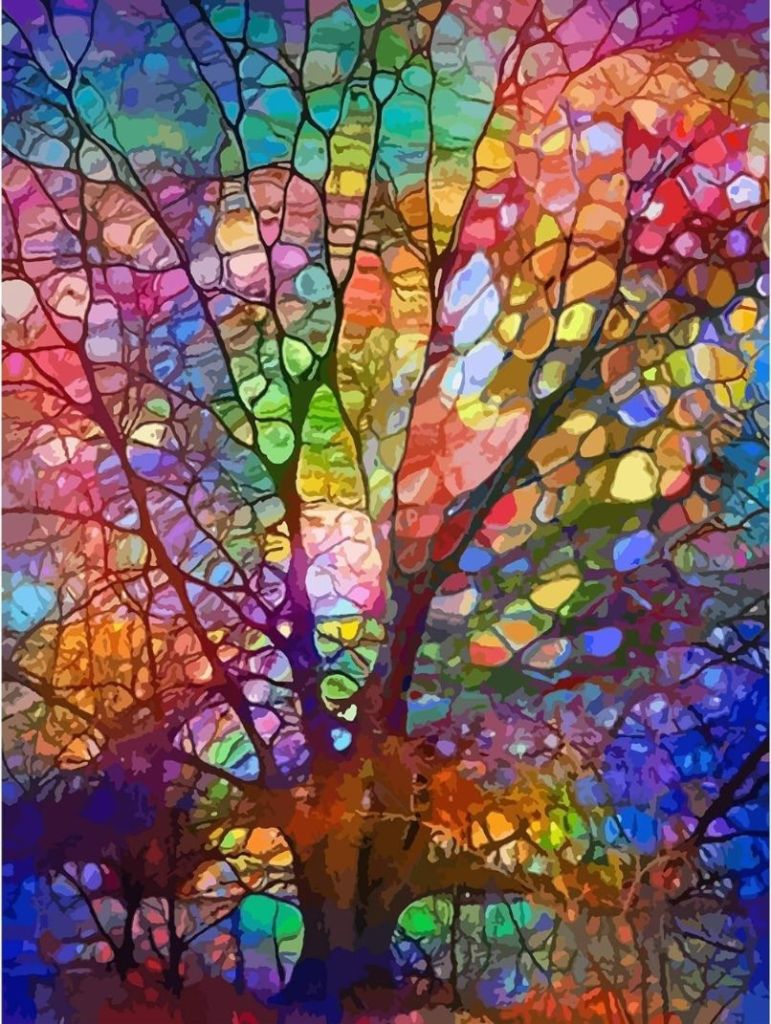
Over the last few months I have been buying rainbow themed Diamond paintings and these six are ones that I do plan on making. I have made one of these, the tree of life on the very bottom left and it did not come out as well as I thought it would, but it is still a nice Diamond painting. I think that the other ones will look a lot better based on the way they look on the canvas with the squares and symbols in them.
Most of the diamond paintings that I’ve bought from Michaels are summer themed and I do plan on selling those as well, and those are the ones that I seem to be working on mostly rather than the rainbow diamond paintings. I will be getting to the rainbow ones, but I would like to focus on finishing all of the Michaels summer diamond paintings so that I can put those in a single listing first, and then when those are finished, I will start working on the rainbow themed Diamond paintings and put all of those in one listing.
I have so far only completed four of these, believe it or not. I still have so many more to make. I made the surfboards first and then I made those two little ones with the rainbow umbrella and the Adirondack chairs and then the beach scene which is called beach chairs and I just finished working on the fourth one called colorful street. The next one that I’m going to make is the one with the pink flamingo in the swimming pool.
I swear the Michael’s Make Market diamond paintings look like they were taken from real pictures. They look so lifelike. I just don’t know how they can make them look so real. And they are Diamond paintings which means they’re pixelated. It’s just the oddest thing that when you’re standing back or even looking at a picture of it, it looks so real. It almost looks like a photograph. I think that’s what makes me so attracted to this brand as opposed to any other brand that I’ve found because these look like they are actual pictures.
Another thing that I love about these summer Diamond paintings is that they come with their own frames. So I don’t have to worry about buying frames for all of these diamond paintings because they’re already in the box. It makes it so much easier to sell something if it comes with its own frame because then I don’t have to spend extra money and then also charge extra money for the frame. I did however have to buy frames for the Rainbow Diamond paintings from Amazon because they don’t come with frames. The summer Diamond paintings from Michaels are all 11×14 and the rainbow ones are 10×14.
I want to focus on the summer Diamond paintings so that I can list those on Etsy first, because summer won’t last forever, but rainbows do. Although, if you love the beach, you’re going to love it all the time. I will have the summer Diamond paintings in there until they’re all sold out.
When I first started Diamond painting, I was doing it only in the bedroom from about 5:00 p.m. until about 11:00 or 12:00 midnight. I didn’t do anything during the day except sit on the couch and watch TV and look at my phone, but I decided that I wanted to start working on some Diamond paintings in the living room and so I’ve been working on a smaller diamond painting in the living room during the day, and then a bigger Diamond painting in the bedroom at night.
I started working on the Mushroom diamond painting that I mentioned in a previous blog post where I talked about putting parchment paper on it instead of the silicone release sheets that I buy from Amazon. I couldn’t get the parchment paper off and there was a lot of stuff on the sticky part of the diamond painting that I still couldn’t get off. I managed to finish making that in 8 days, and I also made another Diamond painting that I started making a few days ago. The diamond painting that I’ve been working on in the living room is one of the summer Diamond paintings that I got on clearance at Michaels.
Beach Chairs by Make Market started on July 27, 2025 and finished on July 30, 2025Mushrooms by Make Market started on July 21, 2025 and finished on July 29, 2025
The Beach Chairs Diamond painting came with its own wooden magnetic frame, but the bigger ones don’t come with frames. I will have to eventually buy a wooden magnetic frame and cut the sides off. I’ll have to scrub the entire Mushroom Diamond painting with a scrub brush and some water to scrub out all of the crap left from the parchment paper. I already tried it and it seemed to take the dirt off without taking any of the diamond drills off, so I’ll have to go over the whole entire diamond painting before I seal it.
This whole making two Diamond paintings at one time seems to be working out for me, although my back is in a lot of pain LOL.
I have chosen two new diamond paintings to start making on July 31, 2025. They are Colorful Street which is a 11×14 diamond painting, the same size as the Beach Chairs diamond painting, and it comes with a wooden magnetic frame.
And then for the bigger one in the bedroom, I’ve chosen Lake Forest which is a 18×24 diamond painting.
The Lake Forest Diamond painting is the same size as the Sunflower Bouquet diamond painting that I made before that took me 3 weeks to make. I’ve gotten a little faster at making Diamond paintings, so perhaps it might not take me that long, but it still will take a while. It might not take me 3 weeks, but I’m sure it won’t be less than 2 weeks. This is still a big Diamond painting to make. But I enjoy making them and this is going to look wonderful in our living room.
I “kitted up” both kits and I have the Colorful Street in the living room ready to go for tomorrow morning, and I have the Lake Forest on my desk in my bedroom ready to go tomorrow night. I’m looking forward to making both of these because I really love them.